Getting Started
Welcome to the GoChain documentation! This guide will help you get started with GoChain, a platform for orchestrating permissioned blockchain networks using Hyperledger Fabric and Hyperledger Besu technology.
Choosing a Platform: GoFabric vs GoBesu
GoChain offers two distinct blockchain platforms. Choose the one that fits your use case:
| GoFabric | GoBesu | |
|---|---|---|
| Underlying technology | Hyperledger Fabric | Hyperledger Besu (Ethereum) |
| Smart contract language | Go, JavaScript, or Java (chaincode) | Solidity |
| Consensus | Configurable (Raft, BFT) | QBFT (Quorum Byzantine Fault Tolerance) |
| Best for | Enterprise workflows with fine-grained access control, private channels, and complex multi-party business logic | Ethereum-compatible use cases, token issuance (ERC-20/721/1155), DeFi-adjacent applications |
| Identity model | Certificate-based (X.509 / PKI) | Ethereum key pairs |
| Transaction finality | Immediate (within channel) | Immediate (QBFT) |
| Multi-org governance | Proposal/endorsement per Business Group | Proposal/vote per Business Group |
| API integration | CCApi (REST over chaincode) | EthApi (REST over smart contract) |
If you're unsure which to choose, GoFabric is the recommended starting point for enterprise use cases that require strict access control and data privacy across multiple organizations. Use GoBesu if you need Ethereum compatibility or are working with token standards.
- Create your account
- Your first onboarding
- Create an infrastructure
- Create your first GoFabric organization
- Next Steps
Create your account
On the login page of GoChain, click on the "Sign Up" button on the top right corner to create your account. You will need to provide:
- Name
- Username
- Password
After creating your account, confirm your account with the code sent to your email. Now you can log in to GoFabric.
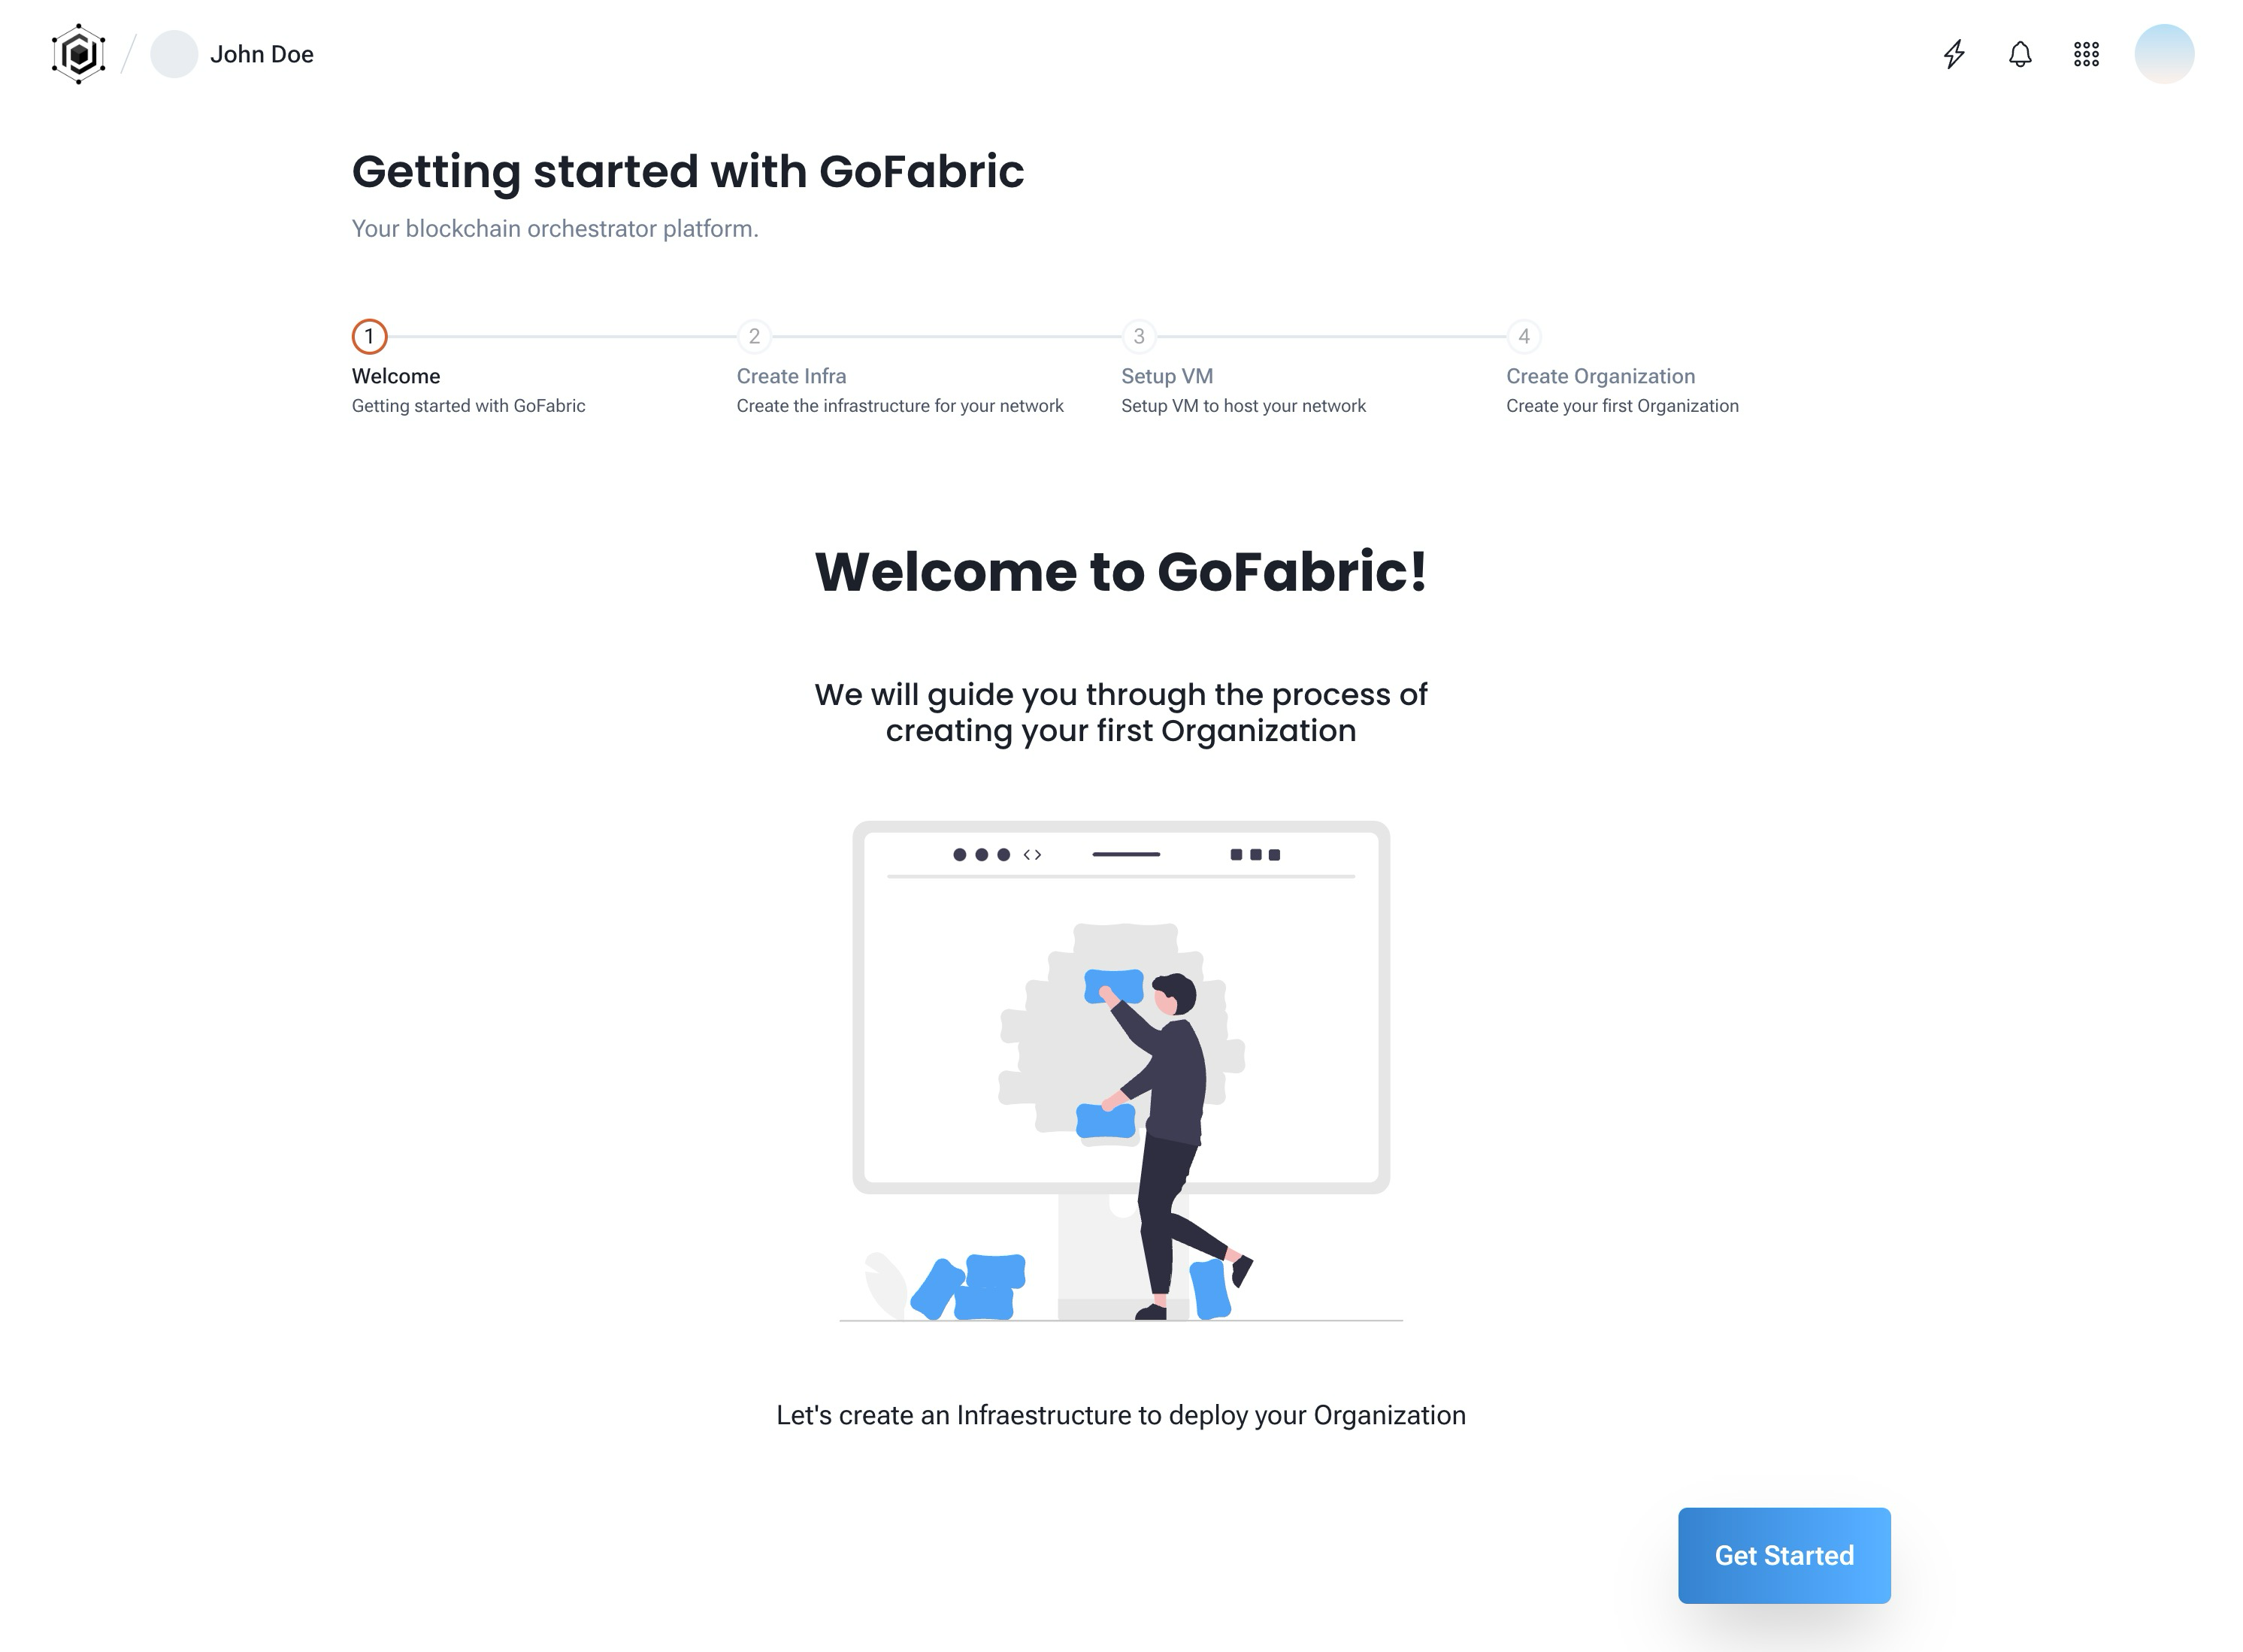
Your first onboarding
After logging in, you will be prompted to create your first organization. Click on the "Get Started" button to start the onboarding process.
When you first create your account you're allowed to create a single organization as part of the Starter Organization tier. The Starter Organization tier is free and allows you to create a single organization with a single peer and a single orderer. You can also be part of one Business Group. You can upgrade your plan at any time to expand your org features. To get more details on plans and upgrade options check the Pricing page.
Create an infrastructure
The first step is to create the infrastructure for your organization. The GoInfra module allows you to create and manage the infrastructure for your organization. You can choose from the following providers:
- External: This option allows you to use your own infrastructure, by providing the SSH credentials and IP addresses of the machines that will be used as VMs for your organization.
- AWS: This option allows you to create your infrastructure on your AWS account, by providing your AWS credentials. GoInfra will create the VMs and the security group for your organization.
- GCP: This option allows you to create your infrastructure on your Google Cloud Platform account, by providing your GCP credentials. GoInfra will create the VMs and the firewall rules for your organization.
- Azure: This option allows you to create your infrastructure on your Azure account, by providing your Azure credentials. GoInfra will create the VMs and the network security group for your organization.
- Kubernetes EKS: This option allows you to deploy on Kubernetes using Amazon EKS. You will need to provide your AWS credentials, the EKS cluster name that will be used for your organizations and as an DNS name previously created for your cluster. GoInfra will create the necessary resources on your cluster and deploy the blockchain components as pods on your cluster.
- Kubernetes On-Prem: This option allows you to deploy on your own Kubernetes cluster. You will need to provide the kubeconfig file that will be used to connect to your cluster. GoInfra will create the necessary resources on your cluster and deploy the blockchain components as pods on your cluster. (Coming soon)
- GoLedger: This option will use GoLedger as a provider, so you don't need to manage any infrastructure. (Coming soon)
ℹ️ Note: For more details on the infrastructure providers and how to create them, check the Infrastructure Guide section of the documentation.
The Starter Organization tier allows External and GoLedger providers. The AWS, GCP, Azure, and Kubernetes EKS providers are available on higher plans. For this guide, we will show you how to create an External and an AWS infrastructure provider.
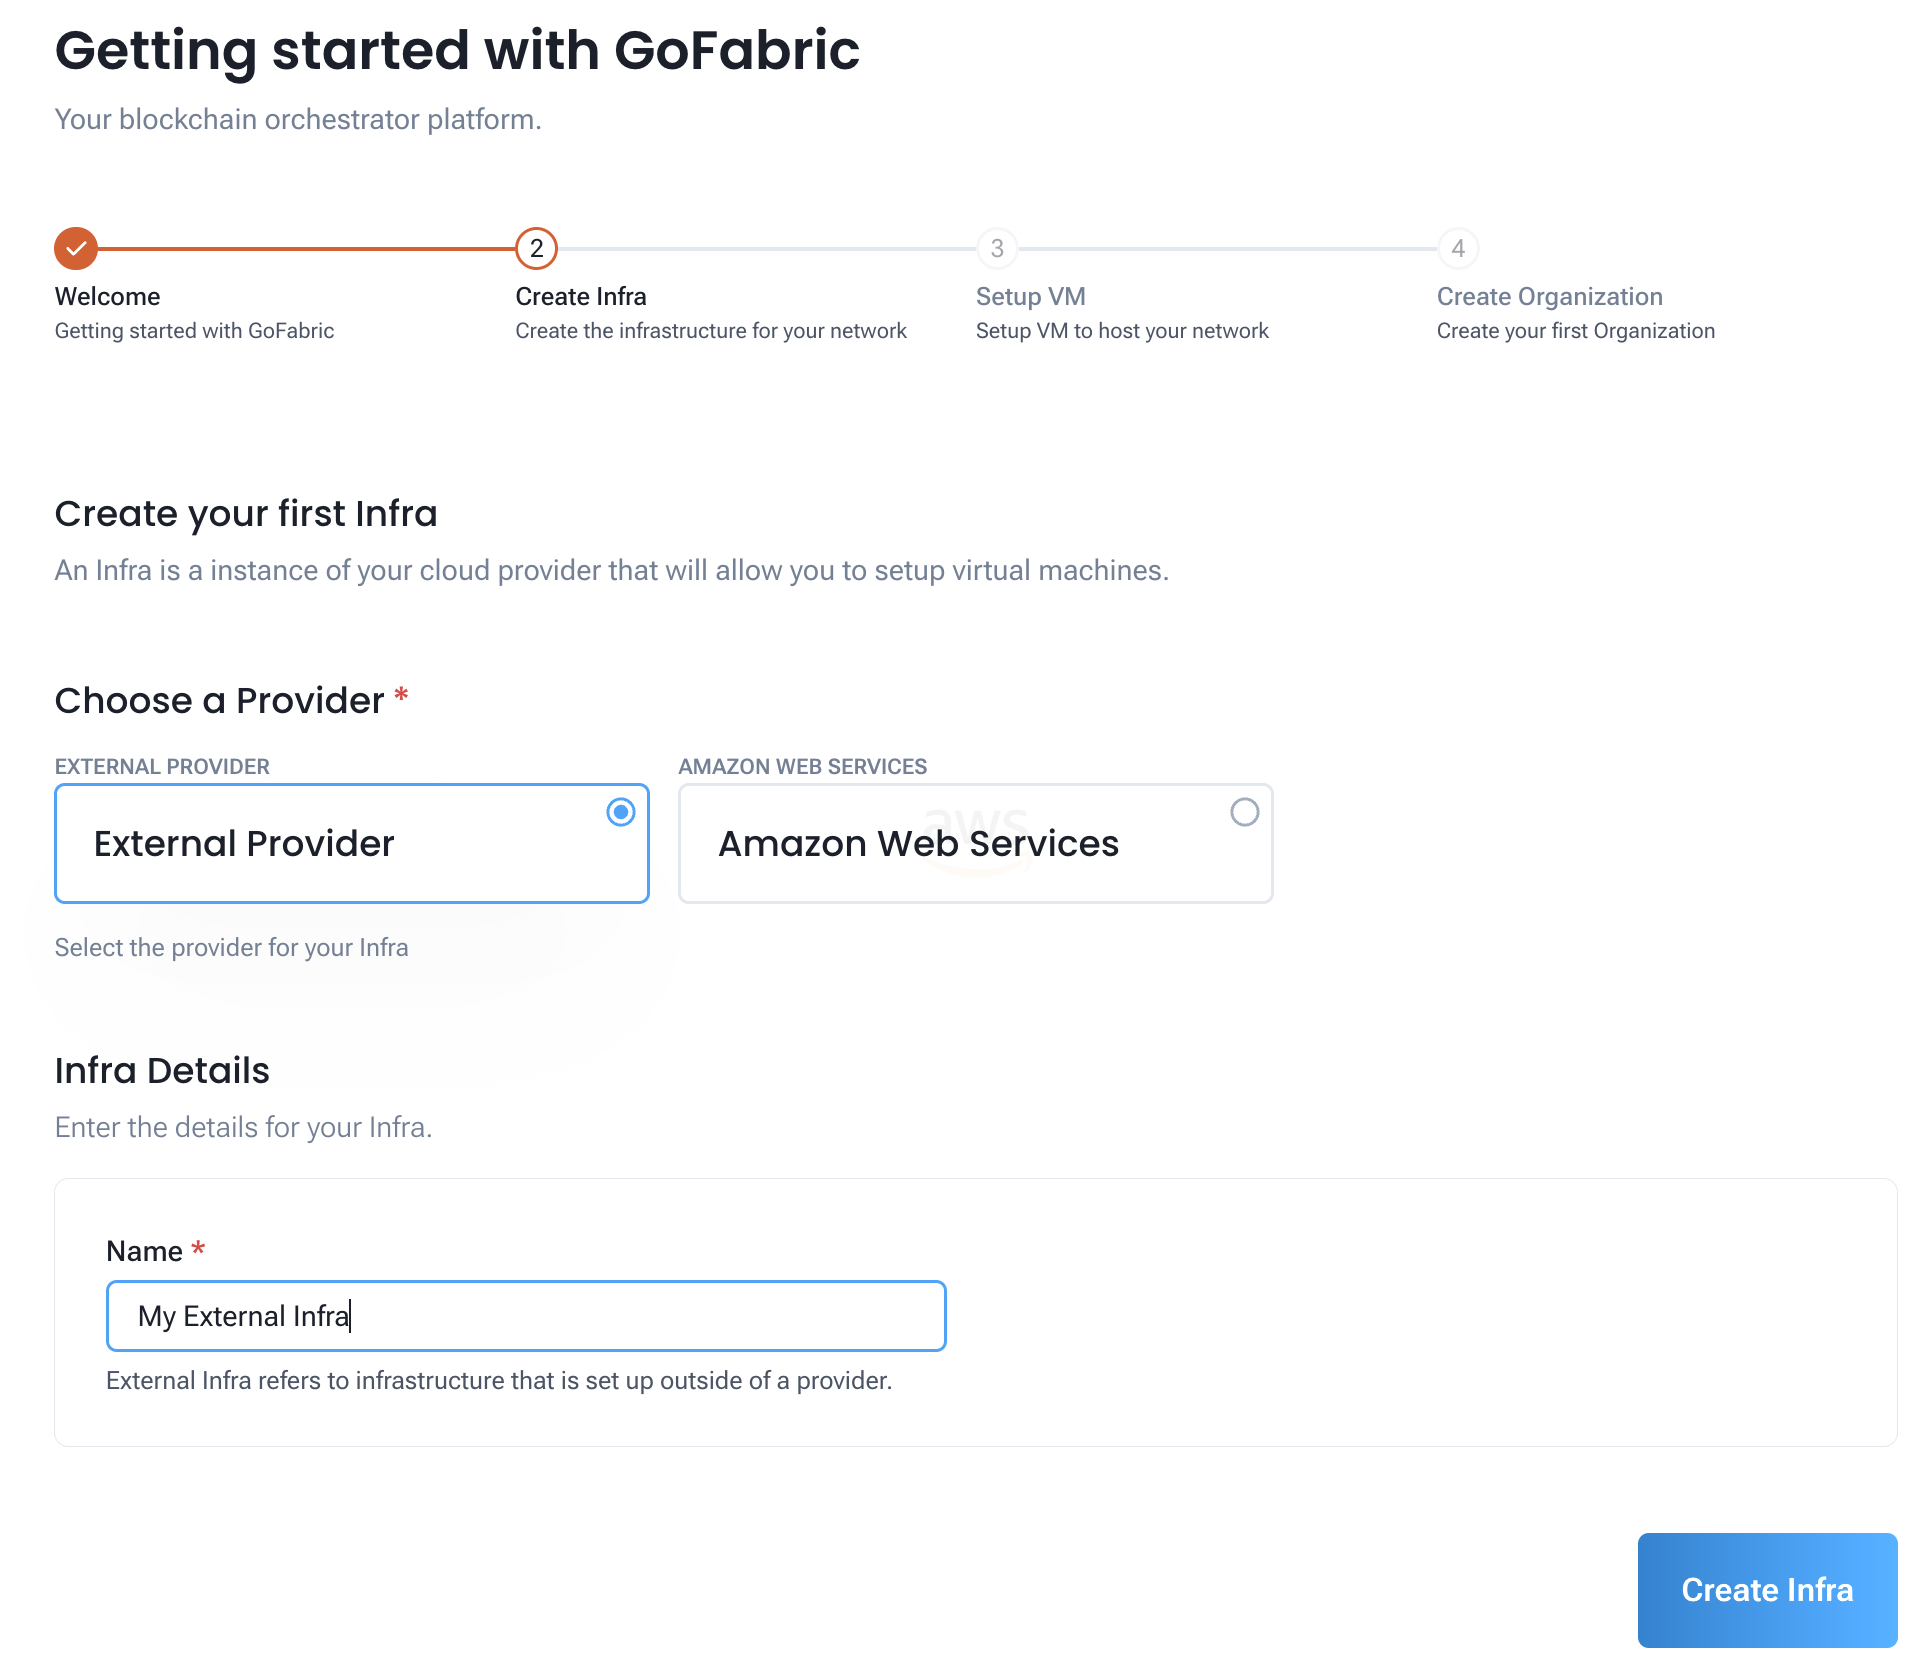
Creating an External infra provider
If you choose the External provider, you will need to inform the following information:
- Name: The name of your infrastructure
Then just click on the "Create Infra" button to create your infrastructure.
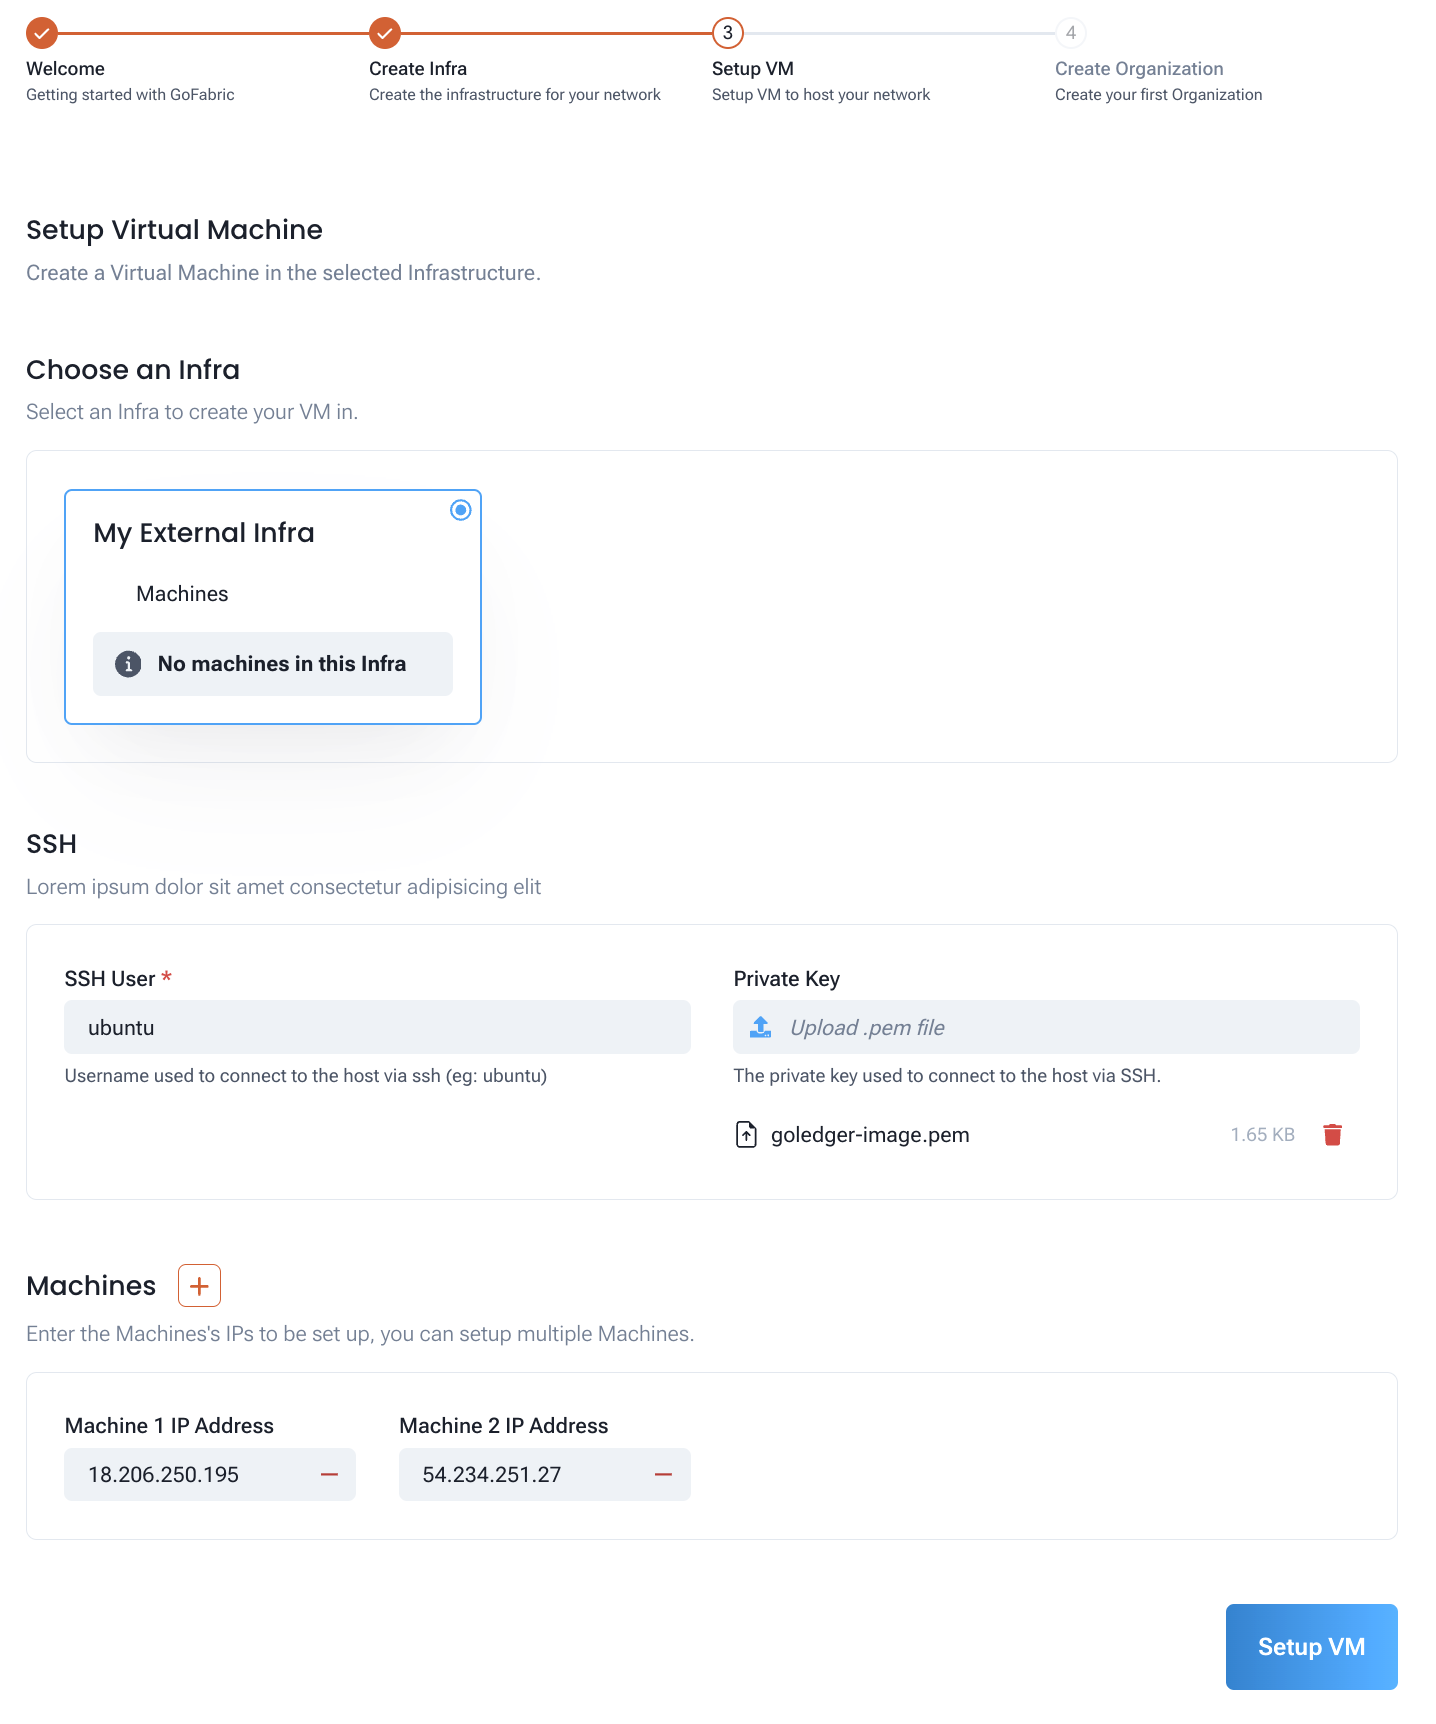
Now you can proceed to the next step, which is setting up your virtual machines (VMs).
To set up your VMs, you will need to inform the following information:
- SSH User: The user that will be used to connect to the VMs
- SSH Key: The SSH key that will be used to connect to the VMs
- IP Addresses: The IP addresses of the VMs that will be setup
During setup, you can see the progress of the VM configuration.
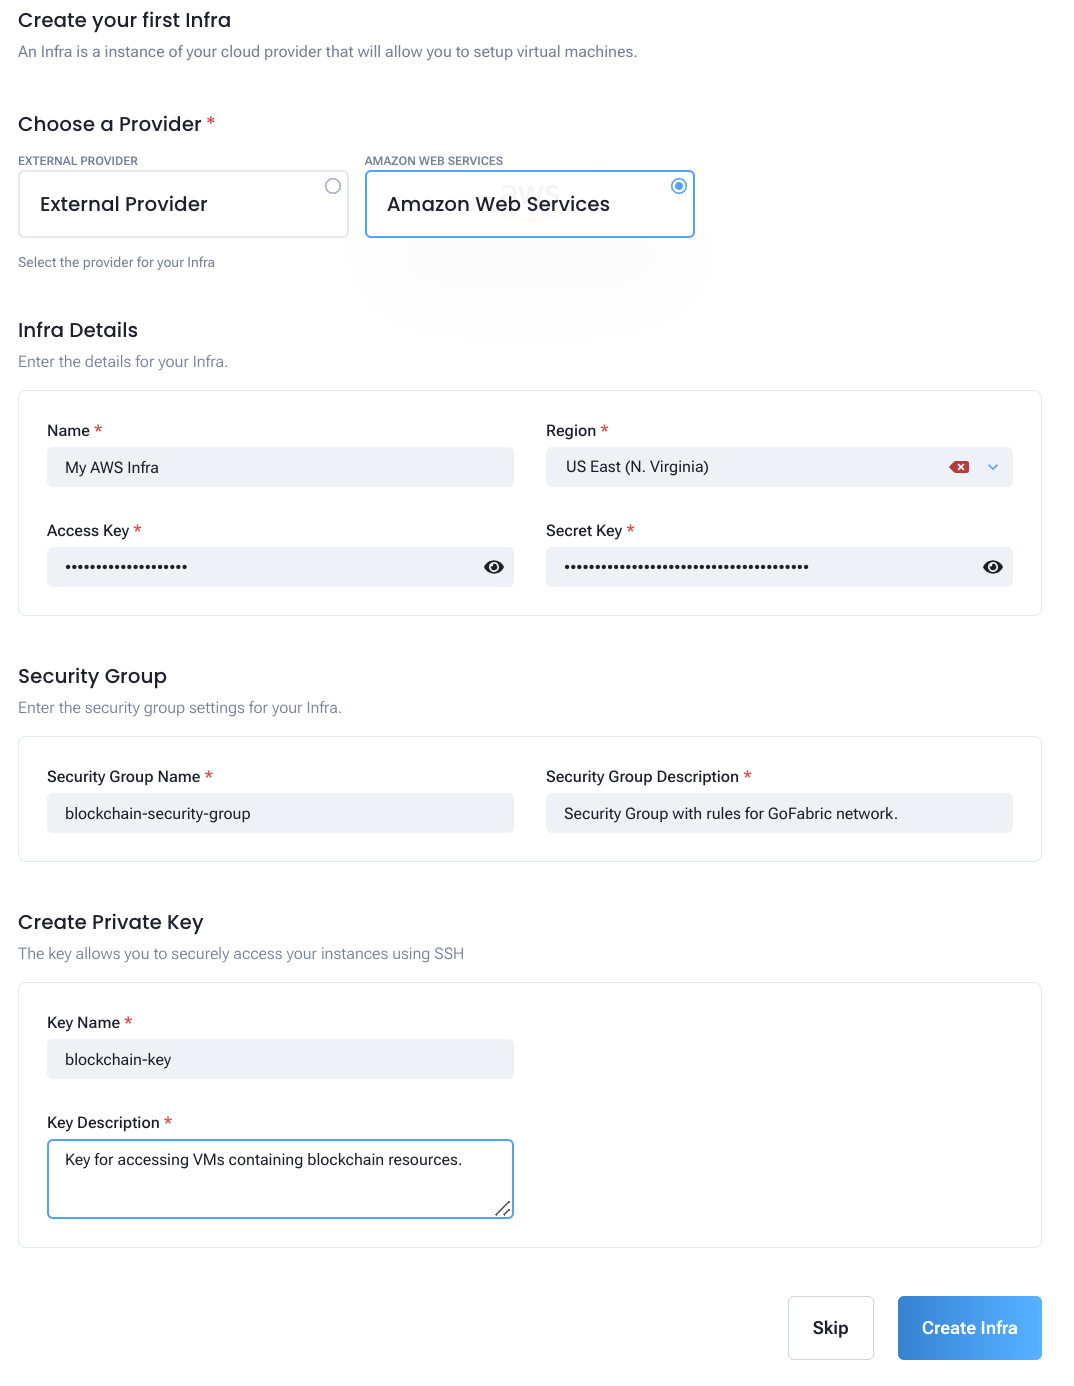
Creating an AWS infra provider
If you choose the AWS provider, you will need to inform the following information:
- Name: The name of your infrastructure
- Region: The AWS region where your infrastructure will be created
- Access Key: Your AWS Access Key
- Secret Key: Your AWS Secret Key
- Security Group Name: The name of the security group that will be created. This should not exist in your AWS account. GoInfra will the firewall rules for the blockchain resources.
- SSH Key Name: The name of the SSH key that will be created. This should not exist in your AWS account. GoInfra will create the SSH key to be used to connect to the VMs.
Then just click on the "Create Infra" button to create your infrastructure.
Now you can proceed to the next step, which is setting up your virtual machines (VMs).
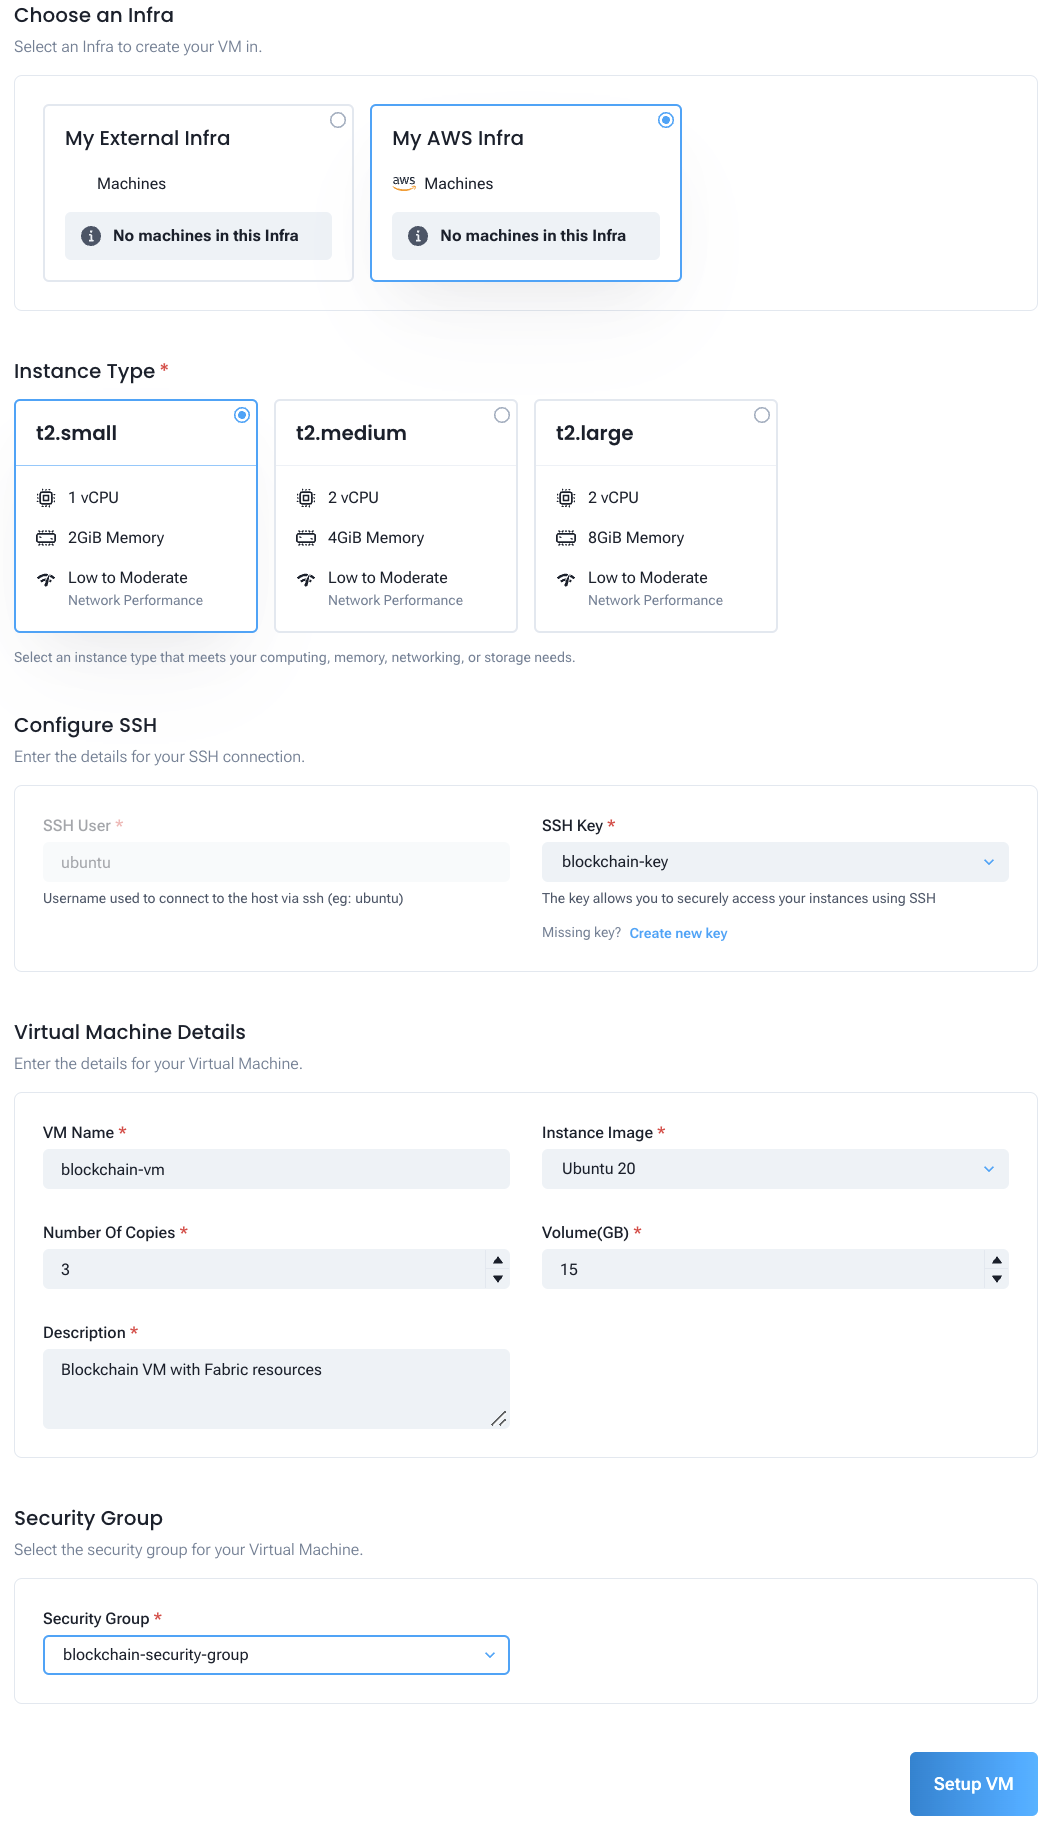
To set up your VMs, you will need to inform the following information:
- Instance Type: The type of the VM that will be created
- SSH Key: The SSH key that will be used to connect to the VMs. This was created in the previous step.
- Instance name: The name of the VM that will be created
- Instance image: The image of the VM that will be created. Currently, only Ubuntu 20 is supported.
- Instance count: The number of VMs that will be created
- Storage size: The size of the storage that will be created
- Security Group Name: The name of the security group that will be used. This was created in the previous step.
During setup, you can see the progress of the VM configuration.
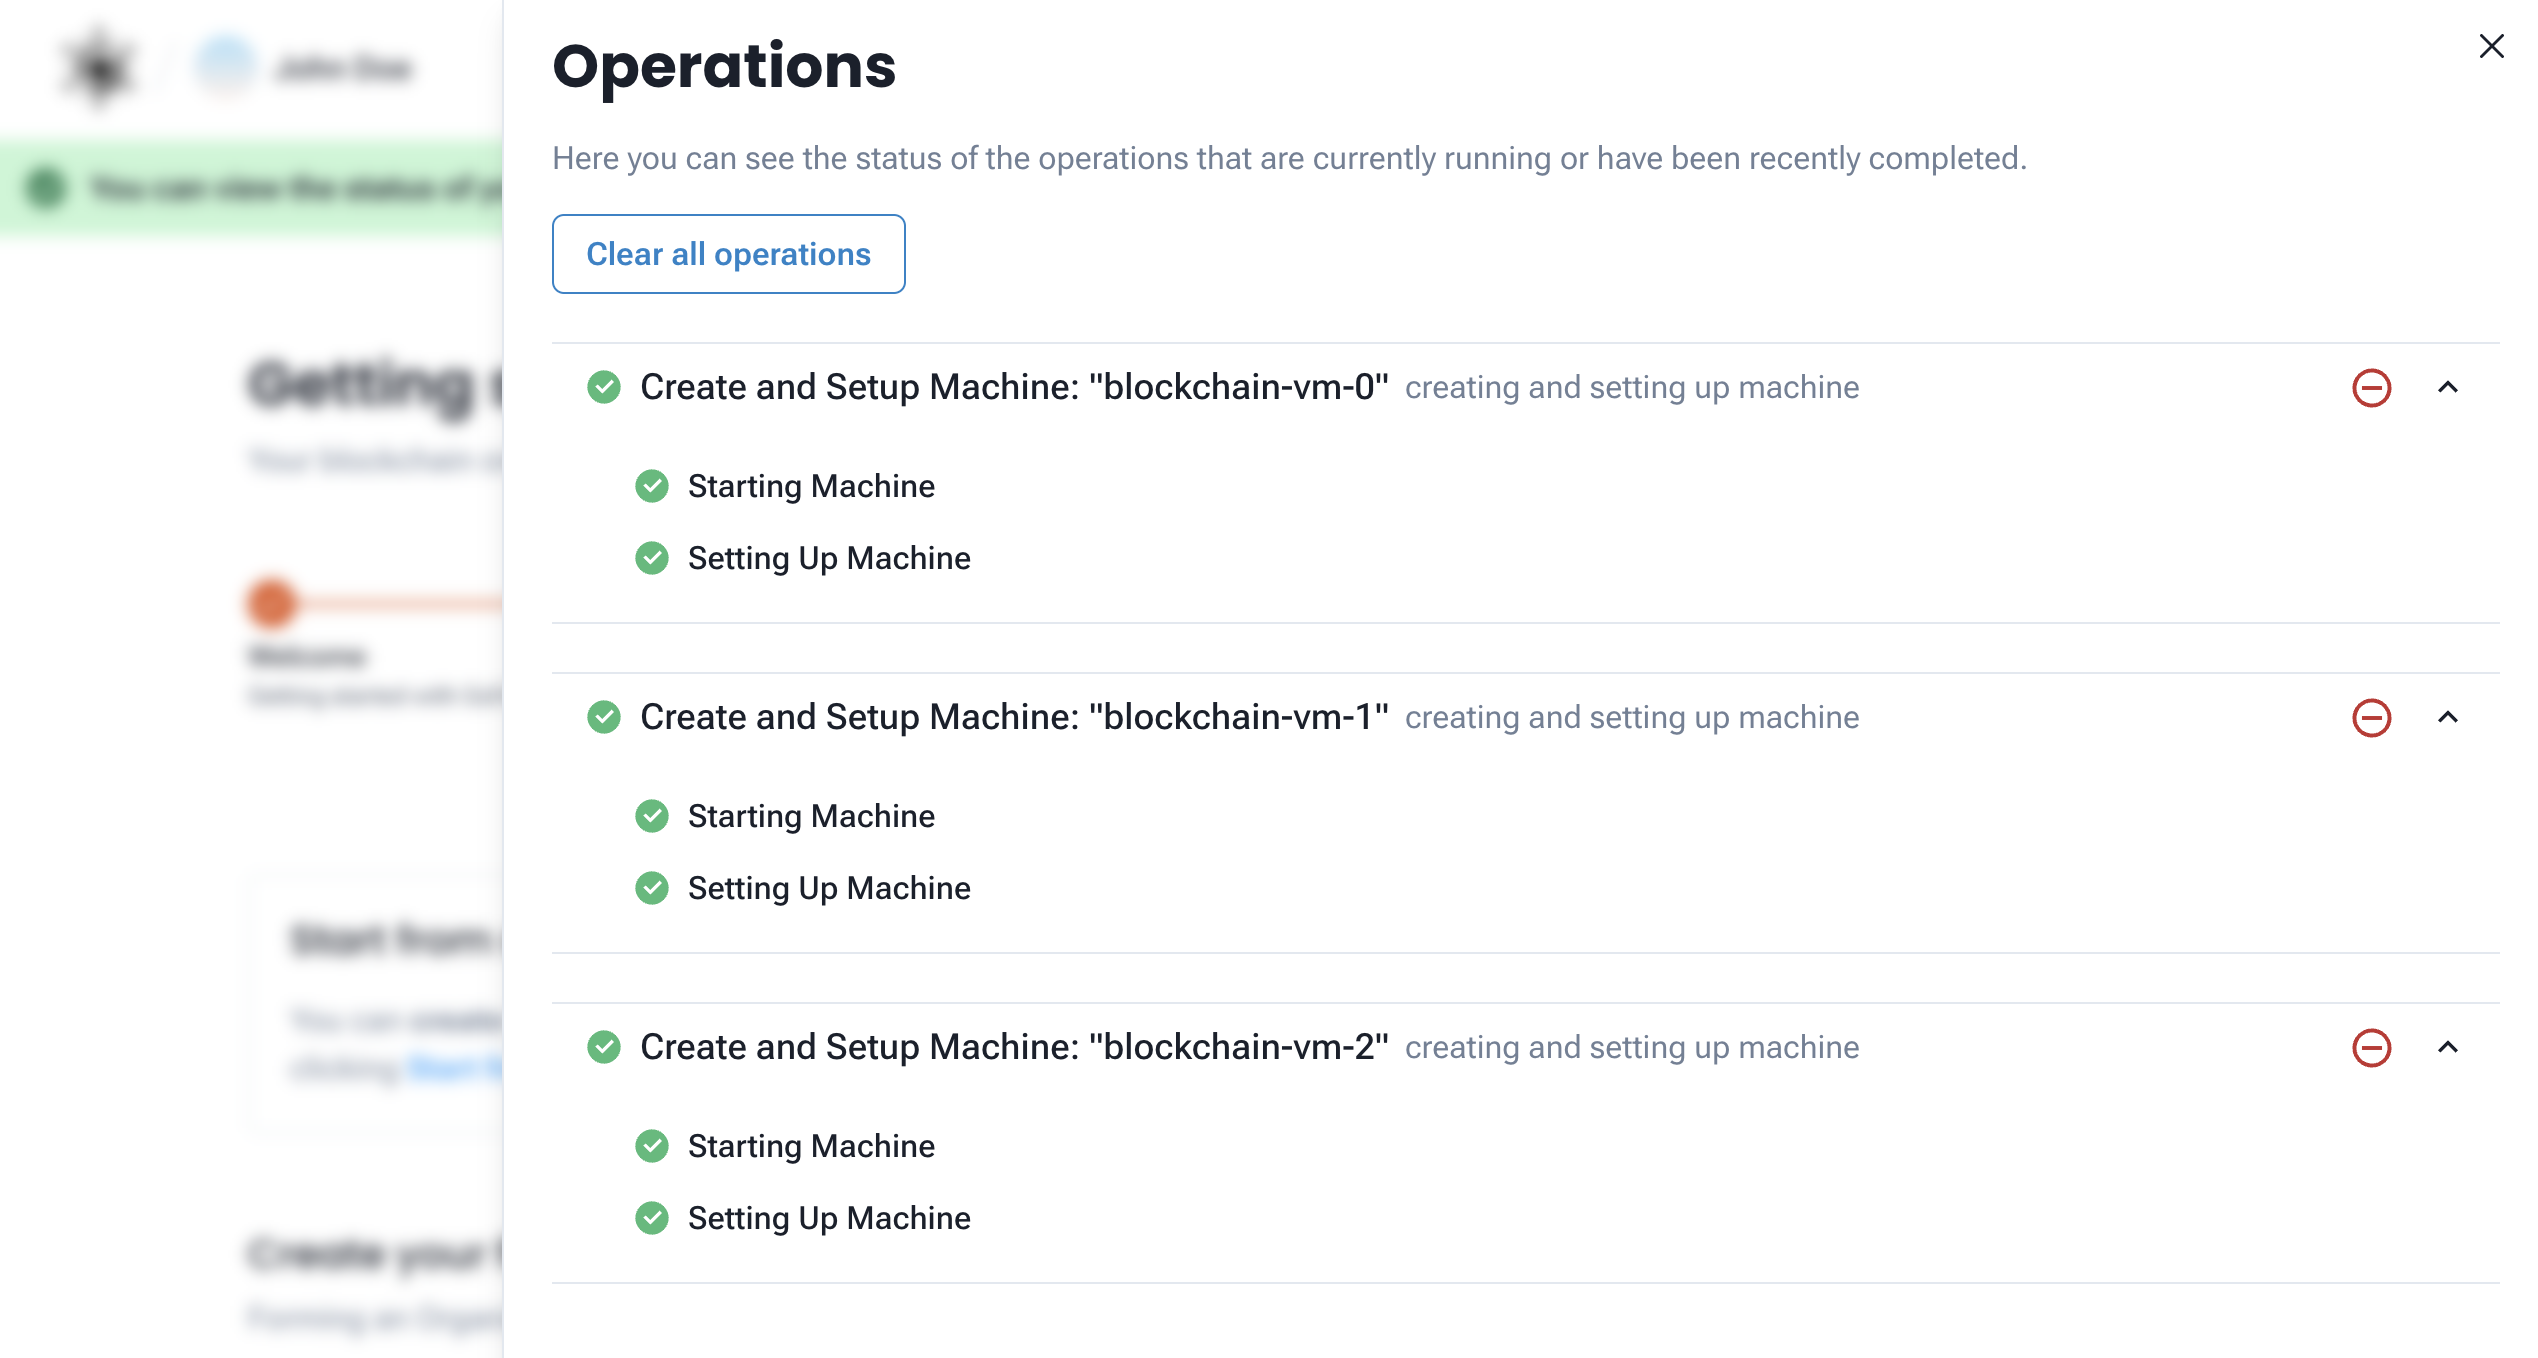
You can also see the details of the VMs that were created on your AWS account.
After setting up your VMs, you can proceed to the next step, which is setting up your first organization.
Create your first organization
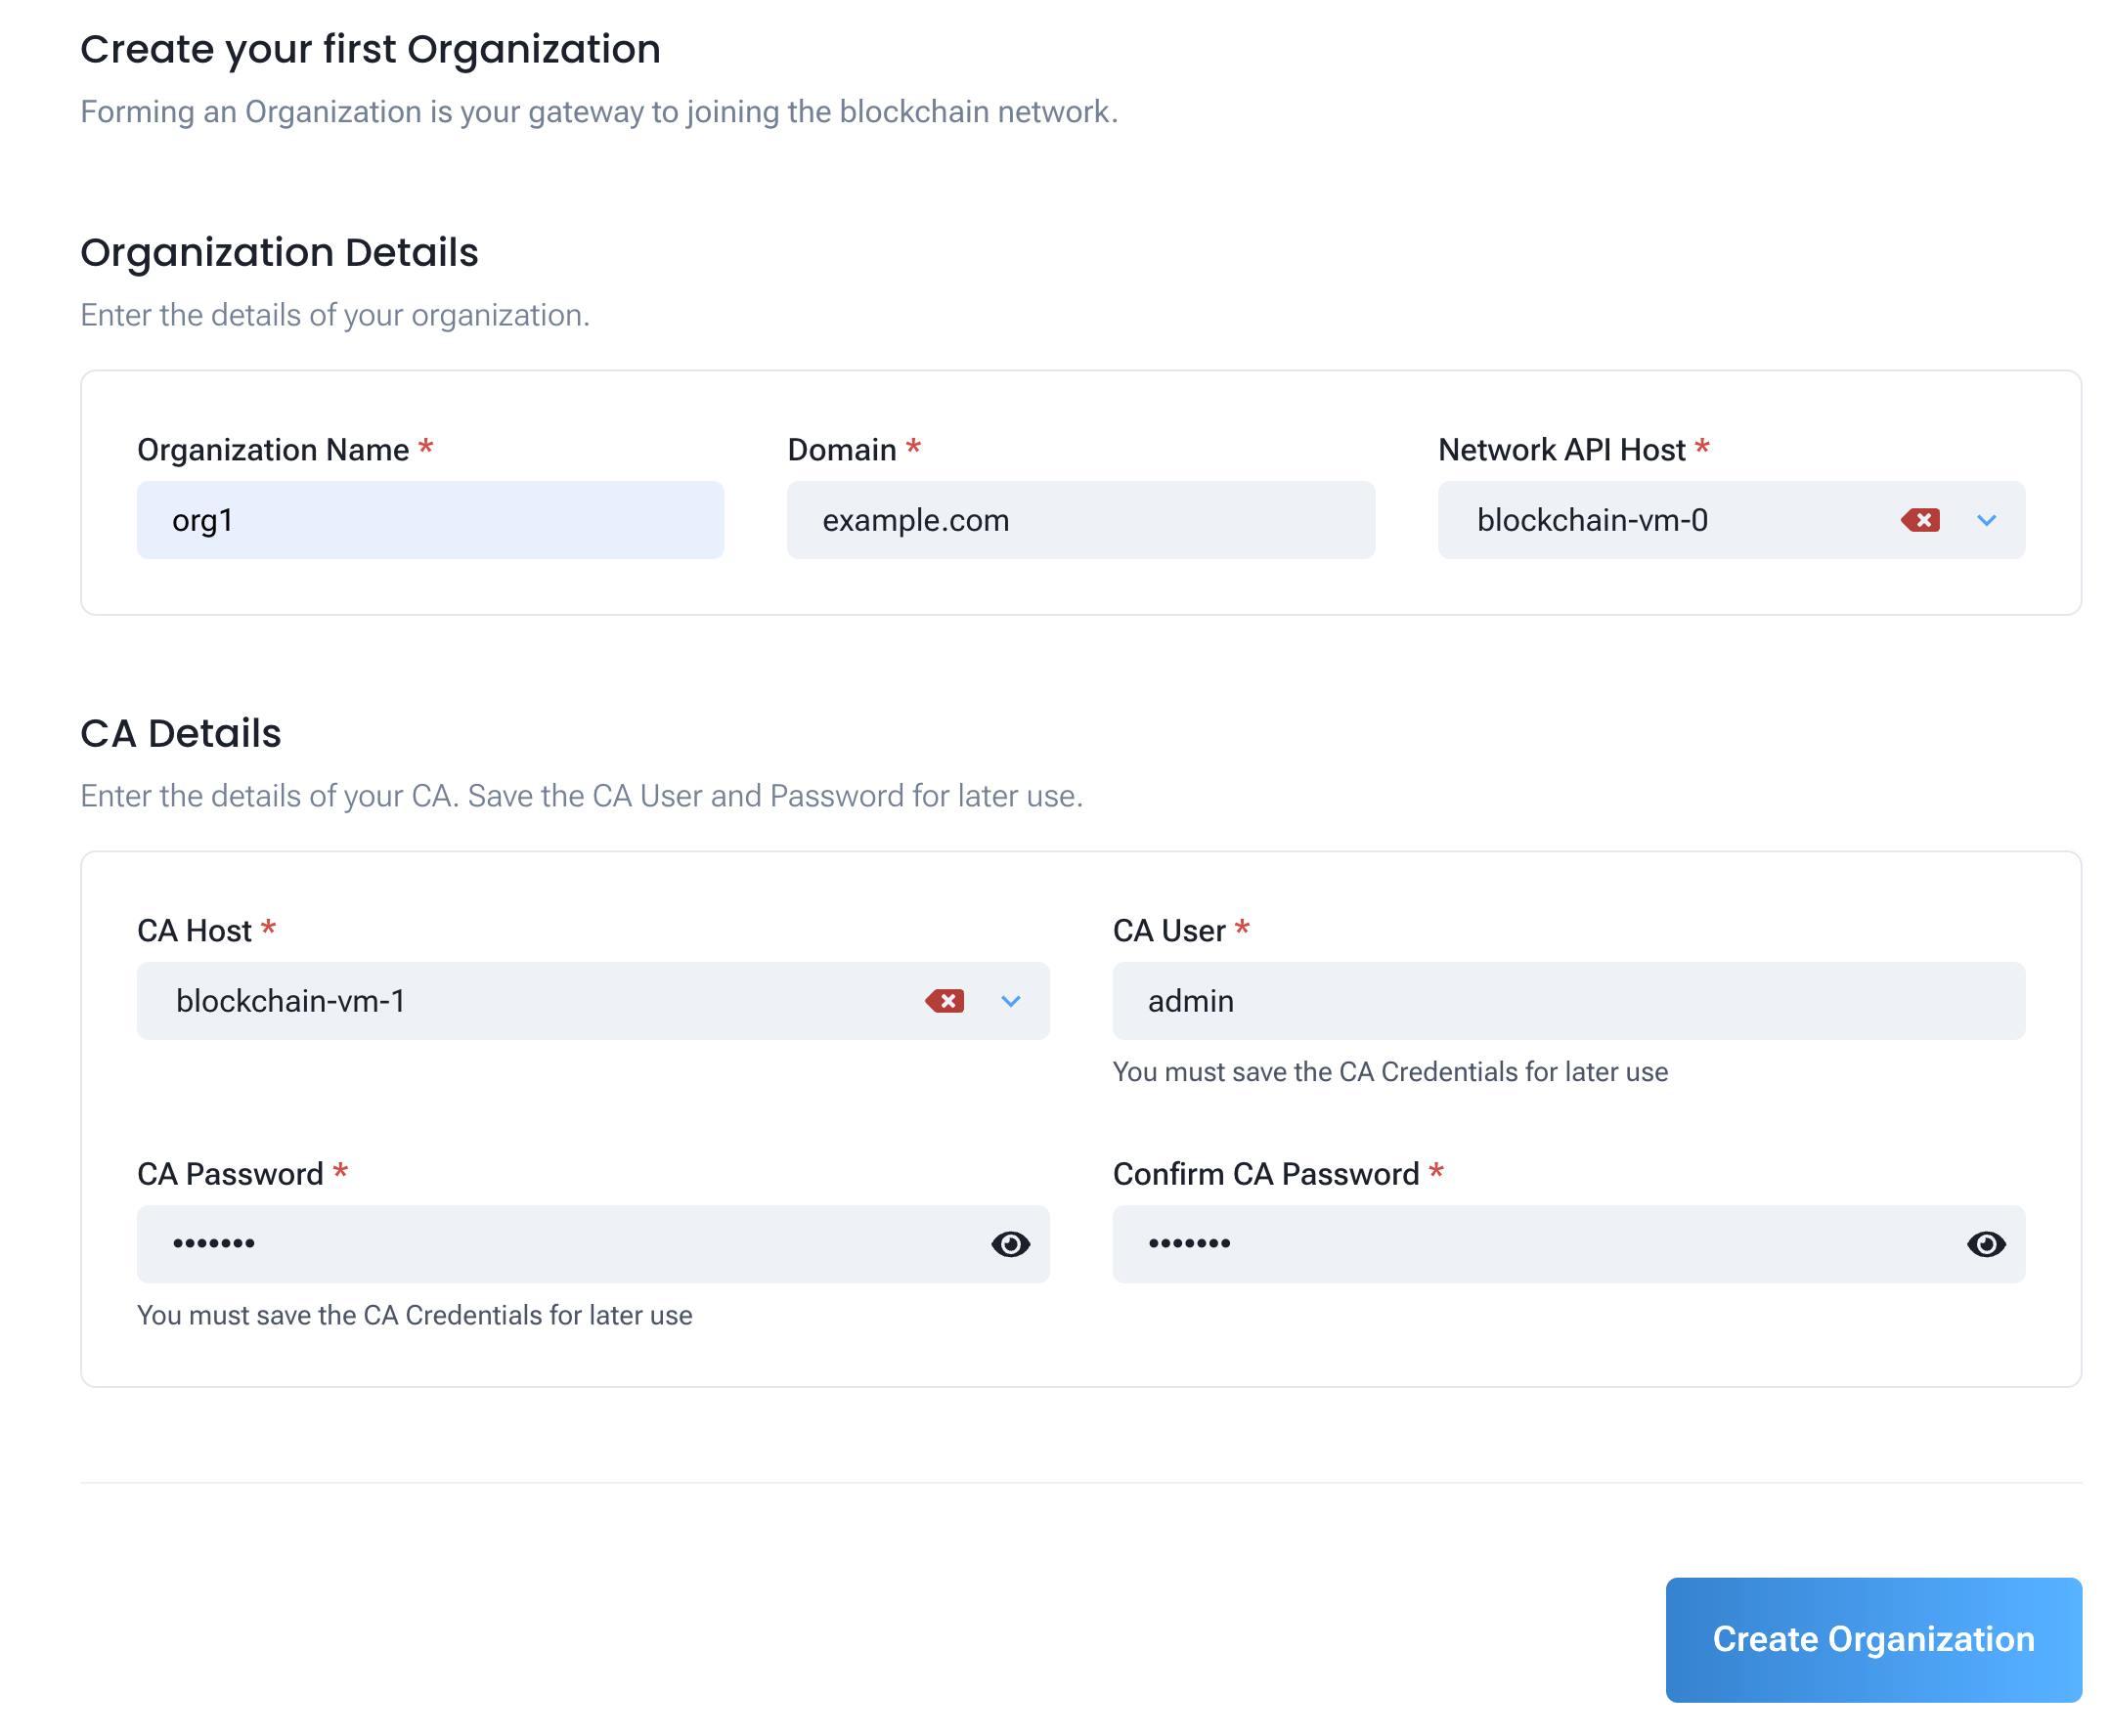
To create your first organization, you will need to inform the following information:
- Name: The name of your organization
- Domain: The domain of your organization
- Network API Host: The host of the network API. The network API is used by GoFabric for managing the organization.
- CA User: The user that will be used to connect to the CA
- CA Password: The password that will be used to connect to the CA
- CA Host: The host of the CA
Then just click on the "Create Organization" button to create your organization.
After creating your organization, you can invite members to manage the organization with you. When the process is done you'll be met with the organization overview.

Next Steps
Now that you have created your organization, you can start creating your nodes and business groups. Recommended next:
- Check the Node Guide section to learn how to create your first peer and orderer nodes.
- Check the Business Group Guide section to learn how to create your first business group and spin up you network.
- Check the Channel Guide section to learn how to create your first channel and add new members to it.
- Check the Chaincode Builder Guide section to learn how to create your first chaincode and deploy it to your network.
- Check the GoBesu Guide section to learn how to set up an Ethereum-based private network using GoBesu, a tool that helps in deploying Besu nodes and setting up a private network for your use case.