Setup Guide
Welcome to the GoFabric Setup Guide! This guide will help you set up a private Fabric network using GoFabric. GoFabric is a powerful tool that simplifies the process of deploying Fabric nodes and creating a private Fabric network tailored to your needs.
Welcome Screen
Before diving into the setup, let's begin by introducing you to the GoFabric platform.
GoFabric allows you to easily set up and manage Fabric networks, and this guide will walk you through creating an organization, setting up infrastructure, configuring virtual machines, and establishing a business group and network. This setup will allow you to launch a fully-functional Fabric-based network for your use case.
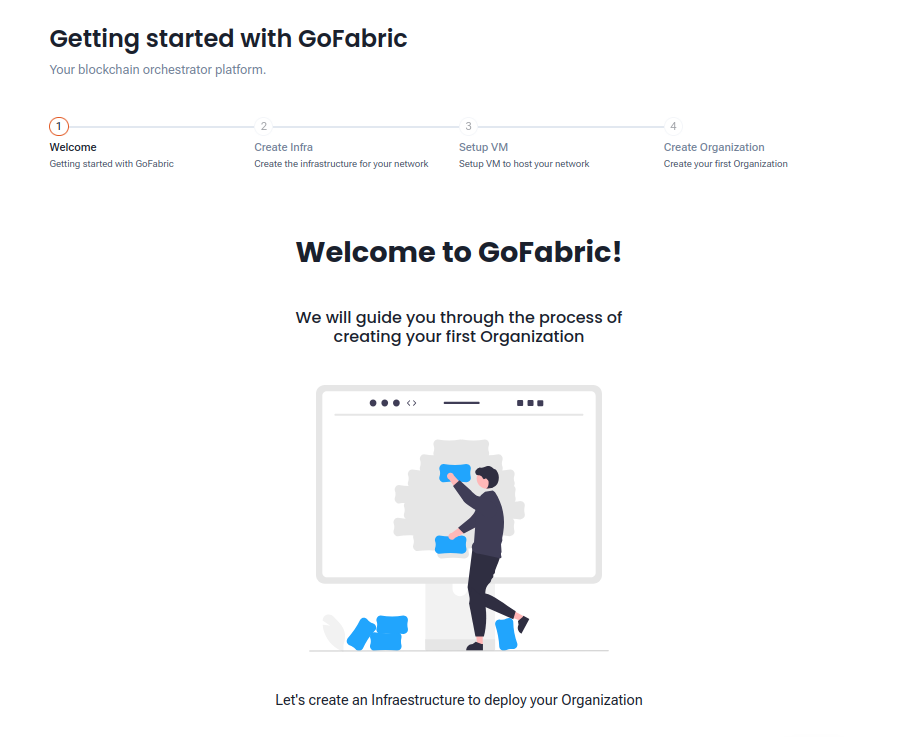 Figure 1: Welcome screen of GoFabric
What You'll Need:
- A GoChain account (sign up if you don't have one yet)
- Basic knowledge of Fabric networks and blockchain concepts
- Access to your cloud infrastructure (AWS, GCP, Azure or an external provider of your choice)
Create Infrastructure
The first step is to create the underlying infrastructure for your network. An "Infrastructure" refers to an instance of your cloud provider that allows you to set up virtual machines (VMs). You can either create a new infrastructure or skip this step if you already have one set up.
Create Your First Infrastructure
If you don't have an existing infrastructure, you'll need to create one. GoChain supports several cloud providers, allowing you to choose the one that best fits your needs. These providers are:
- External Provider: Set up your infrastructure on your own servers.
- Amazon Web Services (AWS): Create infrastructure on AWS using your access keys.
- Google Cloud Platform (GCP): Set up your infrastructure on GCP.
- Microsoft Azure: Use Azure to set up infrastructure.
- GoLedger: A provider where you don’t need to manage the infrastructure yourself. (Coming soon)
Choose a Provider
Select the provider for your infrastructure from the following options:
- External Provider
- Amazon Web Services (AWS)
- Google Cloud Platform (GCP)
- Microsoft Azure
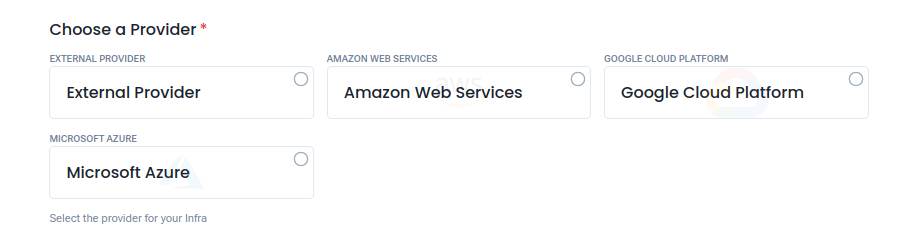 Figure 2: Example of selecting a provider for your infrastructure
Infrastructure Details
After selecting the provider, enter the following details for your infrastructure:
- Name: Enter a name for your infrastructure (e.g., "My Fabric Infra").
- Region: Choose the region where your infrastructure will be located (e.g., Asia Pacific (Tokyo)).
- Provider Credential: If you selected a external provider, enter the credentials required to access your infrastructure. For AWS, GCP, and Azure, you will need to provide the necessary access keys or authentication details.
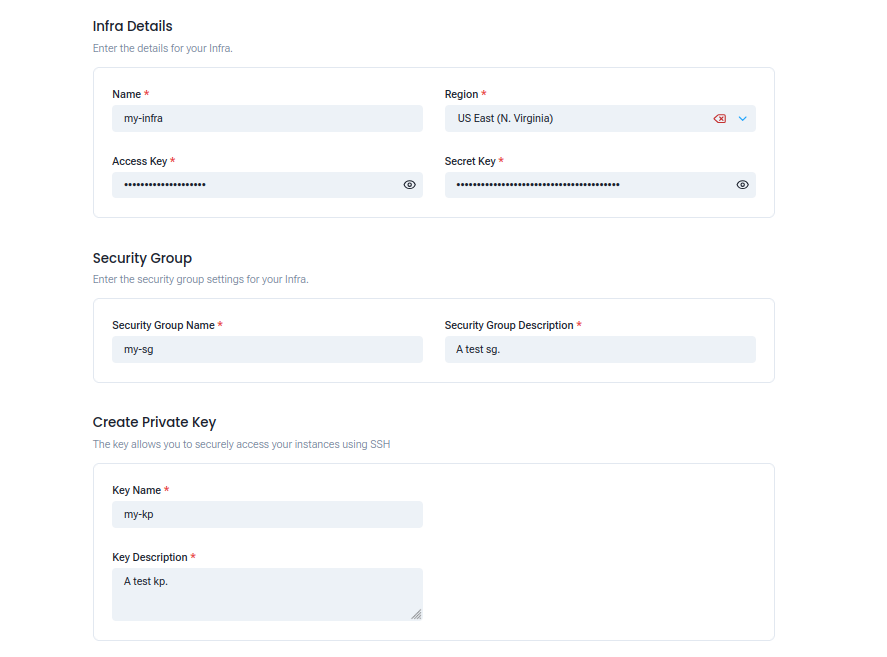 Figure 3: Example of AWS infrastructure setup
You can check more details about the credentials required for each provider in the GoInfra documentation.
Set Up Virtual Machines
After creating the infrastructure, the next step is to set up the virtual machines (VMs) that will host your Fabric nodes. These VMs are essential for running your blockchain network, so it’s important to configure them properly.
If you already have a virtual machine set up, you can skip this step. Otherwise, you’ll need to create a new VM in your selected infrastructure.
Set Up a Virtual Machine
A Virtual Machine (VM) in your infrastructure will host the nodes for your Fabric network. You’ll need to provide several details to configure the VM, such as instance type, SSH connection settings, and security groups.
Choose an Infra
First, select the infrastructure where you want to create the VM. You can either choose an existing infrastructure or set up a new one:
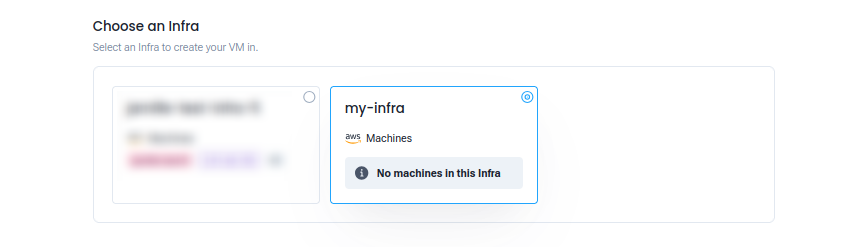 Figure 4: Select the infrastructure for your VM
Instance Type
Select the type of instance that best suits your computing, memory, and network performance needs. You can choose from several instance types:
- Small:
1 vCPU, 2GiB Memory, Low to Moderate Network Performance - Medium:
2 vCPU, 4GiB Memory, Low to Moderate Network Performance - Large:
2 vCPU, 8GiB Memory, Low to Moderate Network Performance
Each provider may have different instance types available, so choose the one that fits your requirements.
Configure SSH
To securely access your virtual machine, you will need to configure SSH. Enter the following details:
- SSH User: Enter the username used to connect via SSH (e.g.,
ubuntu). - SSH Key: Select your private SSH key for secure access. If the key is missing, create a new one for your machine.
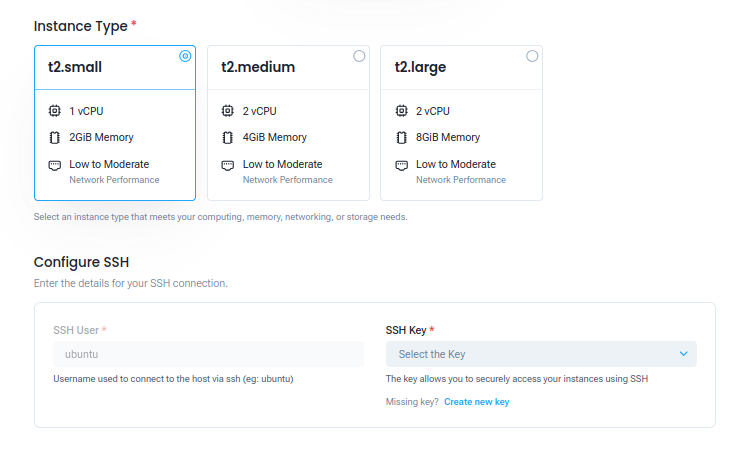 Figure 5: Example of selecting an aws instance type
Virtual Machine Details
Now, configure the specifics of your virtual machine:
- VM Name: Enter a name for your virtual machine (e.g., "Fabric Machine").
- Instance Image: Select the operating system image for your VM (e.g., Ubuntu 20).
- Number of Copies: Specify the number of copies of the VM to create (e.g., 3).
- Volume (GB): Define the disk space for your VM (e.g., 12 GB).
- Description: Provide an optional description for your VM.
Security Group
Select the appropriate security group for your virtual machine to control its inbound and outbound network traffic:
- Security Group: Choose a security group (e.g., "Blockchain Security").
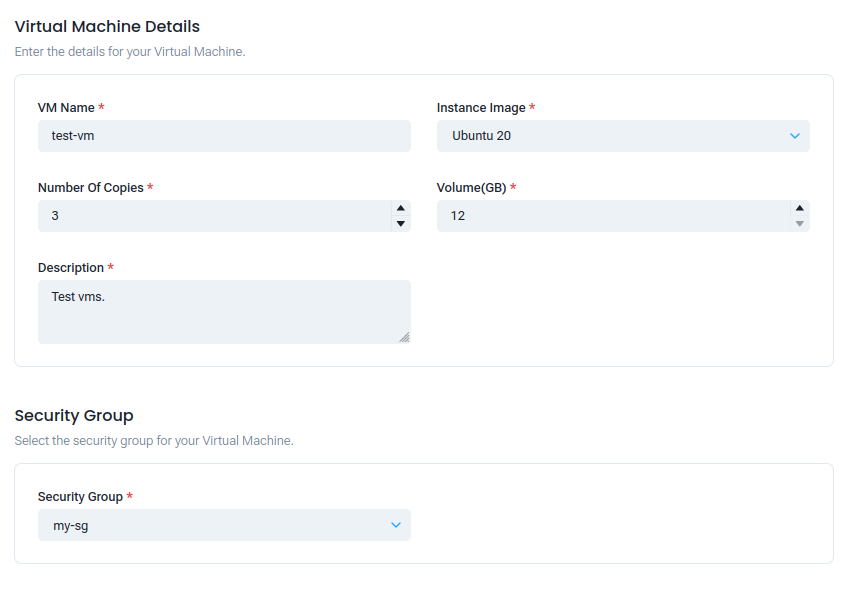 Figure 6: Example of vm configuration
Once you have entered all the necessary details, click on the "Setup VM" button to finalize the setup.
Wait for Virtual Machine Creation
After submitting the configuration, the virtual machines will start to be created. This process might take a while, depending on your infrastructure provider and selected VM settings. Please be patient as the creation of the virtual machines may take a few minutes.
Once the creation process is complete, you will have your virtual machines ready to use, and you can proceed with the next steps in setting up your network.
Create Organization
After setting up the infrastructure, the next essential step is to create your organization. This step is fundamental, as it establishes the core of your blockchain network. Your organization acts as the gateway for all entities participating in your private Fabric network, including certification authorities, peers, and orderers.
Start from Scratch
You can create a full network from scratch by setting up organizations, business groups, and channels all at once. Alternatively, you can create just a single organization to begin with.
Create Your First Organization
Forming an organization is the key step to joining the blockchain network. You will need to provide some basic details for your organization, such as its name, host, type and certification authority details.
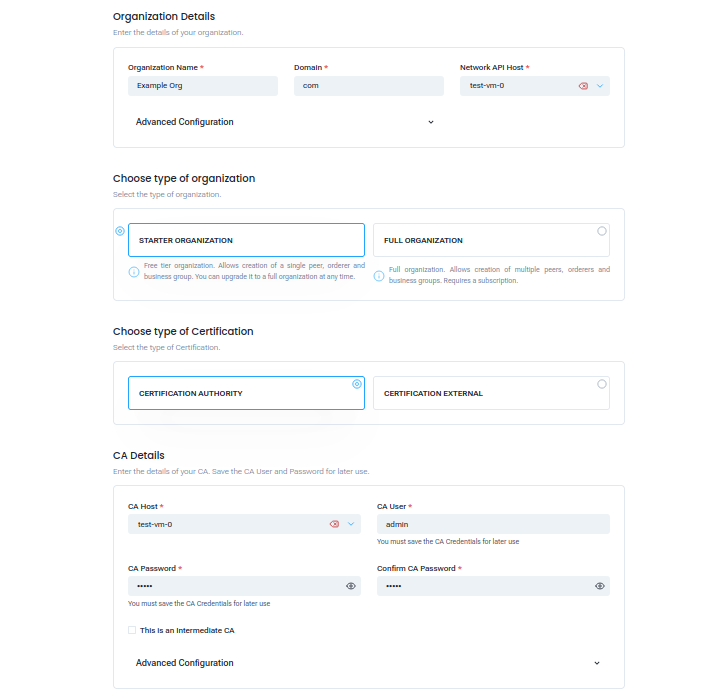 Figure 7: Create organization screen
Organization Details
Fill in the following information to create your organization:
- Organization Name: Choose a name for your organization (e.g., Example-Org).
- Domain: Enter the domain name for your organization (e.g.,
example.org). This domain will be used to identify your organization within the network. - Host: Select the VM previously created to deploy your organization.
- Choose Type of Organization: Select the type of organization based on your needs.
- Starter Organization: The free-tier option allows you to create a single node and business group. You can upgrade to a full organization at any time.
- Full Organization: This option requires a subscription and allows the creation of multiple nodes and business groups, offering more flexibility and scalability for larger projects.
- Certification Authority Details: The certification authority (CA) is responsible for managing the identities and certificates of users and peers in your organization. For more information on the CA, refer to the Certificate Authority documentation.
Once you've entered your organization's details and selected the type, click on the "Create Organization" button to proceed.
Wait for Organization Creation
After submitting your organization's details, you will need to wait for the creation process to complete. This may take a few moments.
Next Steps
You have successfully deployed your first organization on the GoChain platform. To fully utilize Fabric's functionalities, follow the next steps to create channels for your organization and deploy smart contracts.
Recommended next steps:
- Create a BusinessGroup: Learn how to Create BG to interact with other organizations.
- Create a Channel: Learn how to Create Channel.
- Deploy a Chaincode: Learn how to Deploy Chaincodes.
- Manage Organizations: Learn how to manage Organization.
This setup guide will evolve over time with more detailed instructions and visual aids, so stay tuned for more updates!