Chaincode
GoFabric provides a simple way to deploy chaincodes to the network. In this guide, we will show you how to deploy a chaincode to a channel and interact with it.
You can see the chaincodes that are available in your account by navigating to the Builder dashboard. The Builder Dashboard is where you can create and manage the smart contracts associated with your account. You can access the Builder Dashboard by clicking on the Apps tab in the top right corner of the GoChain dashboard.
Add a Chaincode to your account
In order to deploy a chaincode to a channel, you need to add the chaincode to your account. This can be done in two ways:
- Building a Chaincode: You can build a chaincode from scratch using the GoFabric CLI. This is useful if you want to create a simple chaincode that does not require any external dependencies and can be customized to your needs.
- Importing a Chaincode: You can import an existing chaincode from your file system. This is useful if you have a chaincode that you want to deploy to the network without modifying it.
Building a Chaincode
The chaincode are built using two components
1. Base Chaincode
The base is the main component of the chaincode. It contains the basic logic of the chaincode such as CRUD operations.
There are some pre-created base chaincodes that you can use to build your chaincode, but you can always import your own base chaincode. The Bases can be found in the Base Chaincode tab in left sidebar of the Builder dashboard.
2. Template
The template is the part of the chaincode that is customized to your needs. It contains the logic that is specific to your application.
It must be created by you. You can create or import a template in the Template Chaincode tab in left sidebar of the Builder dashboard.
Creating a Template
To create a template, follow these steps:
- Navigate to the Template Chaincode Tab: In the left sidebar of the Builder dashboard, you will see a Template Chaincode tab. This tab allows you to view and manage the templates associated with your account.
- Add the template details: Click on the New Template button to create a new template. You will be prompted to enter the name, version, and description of the template.
- Add the Assets: After setting the details of your template, you will be prompted to add the cusomized assets to the template. You can add as many assets as you want and set specific properties for each asset. The properties can be of type string, number, boolean, date or a custom type you have in your base chaincode.
- Save the Template: After adding the assets, click on the Create Template button to create the template. You will be redirected to the template dashboard where you can see the details of the template.
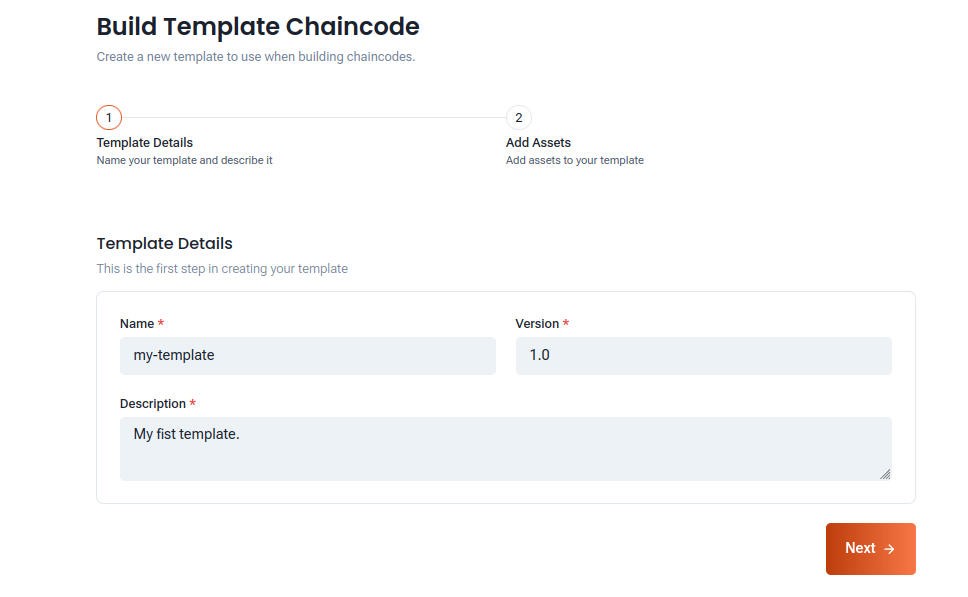 Figure 1: Example of adding the template details
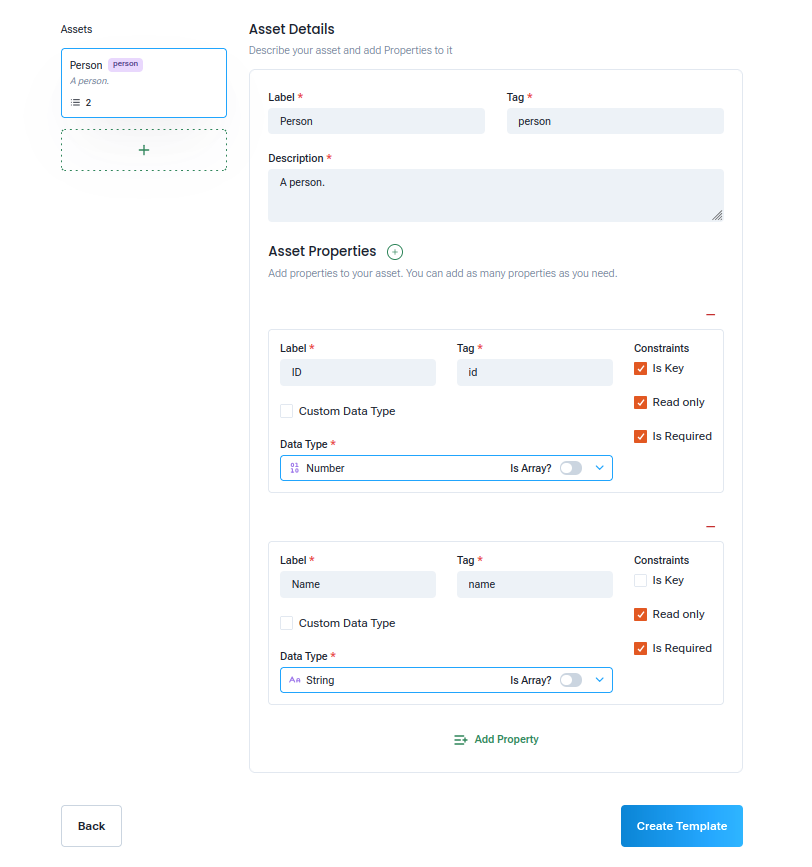 Figure 2: Example of adding the template assets
Building the Chaincode
To build the chaincode, follow these steps:
- Navigate to the Base Chaincode Tab: In the left sidebar of the Builder dashboard,select the Build Chaincode tab.
- Add the details of the chaincode: Set the name and version of your chaincode.
- Select the Template: Select the previously created template you want to use for your chaincode.
- Select the Base Chaincode: Select the base chaincode you want to use for your chaincode.
- Build the Chaincode: Click on the Build Chaincode button to build the chaincode. You will be redirected to the chaincode dashboard where you can see the details of the chaincode.
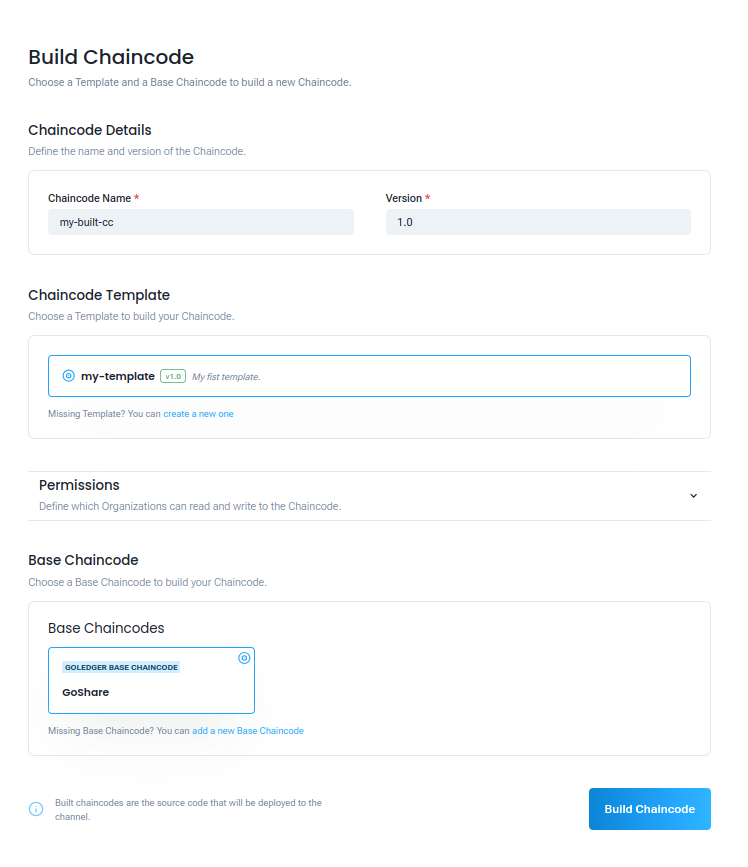 Figure 3: Example of building a chaincode
Importing a Chaincode
To import a chaincode, follow these steps:
- Navigate to the Chaincode Tab: In the left sidebar of the Builder dashboard, select the Upload Source tab.
- Add the details of the chaincode: Set the name and version of your chaincode.
- Generate the chaincode package: Generate the chaincode package as described.
- Upload the chaincode package: Select the chaincode package from your file system and click on the Upload Chaincode button to upload the chaincode. You will be redirected to the chaincode dashboard where you can see the details of the chaincode.
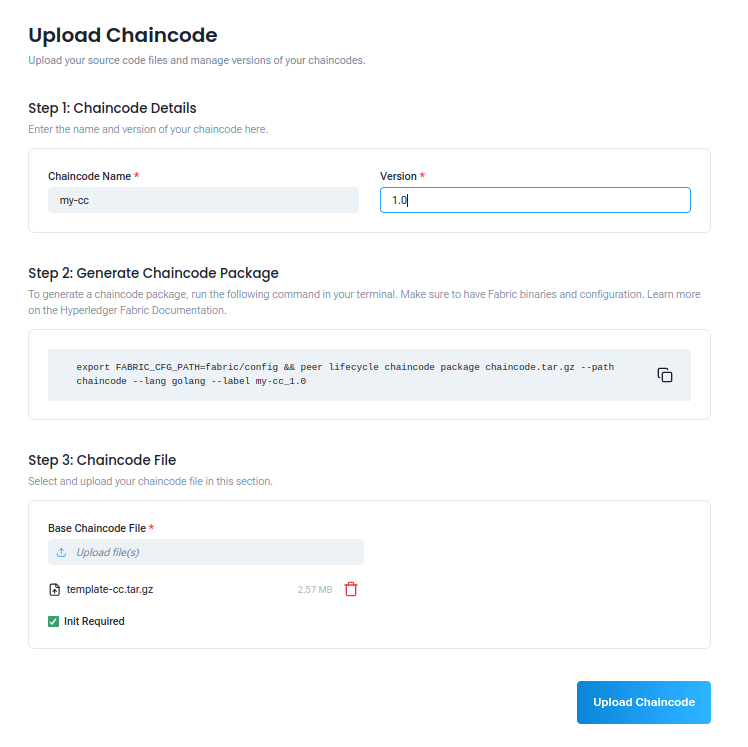 Figure 4: Example of uploading a chaincode
Deploy a Chaincode to a Channel
Once you have added the chaincode to your account, you can deploy it to a channel. This is done through the Chaincodes tab in the channel dashboard. The deployment of the chaincode is done through a proposal. The proposal is sent to the channel members for approval. Once the proposal is approved, the chaincode will be deployed to the channel and will be available for use.
Deploying a Chaincode
To deploy a chaincode to a channel, follow these steps:
- Navigate to the Channel Dashboard: In the left sidebar of the business group dashboard, you will see a Channels tab.
- Select the Channel: Click on the channel name to go to the channel dashboard.
- Go to the Chaincode Tab: In the channel dashboard, you will see a Chaincodes tab. This tab allows you to view and manage the chaincodes associated with your channel.
- Deploying the Chaincode: With the organization which you want to deploy the chaincode:
- Click on the Add Chaincode button to create a new chaincode proposal.
- Select the chaincode you want to deploy from the list of chaincodes available in your account.
- Select the peers of the organization that will be part of the chaincode. (Peers of orther organizations can be selected in the approval step)
- Define the endorsement policy for the chaincode. The endorsement policy is a set of rules that define which organizations must endorse a transaction before it can be committed to the ledger.
- Click on the Add Chaincode button to create the proposal to deploy the chaincode.
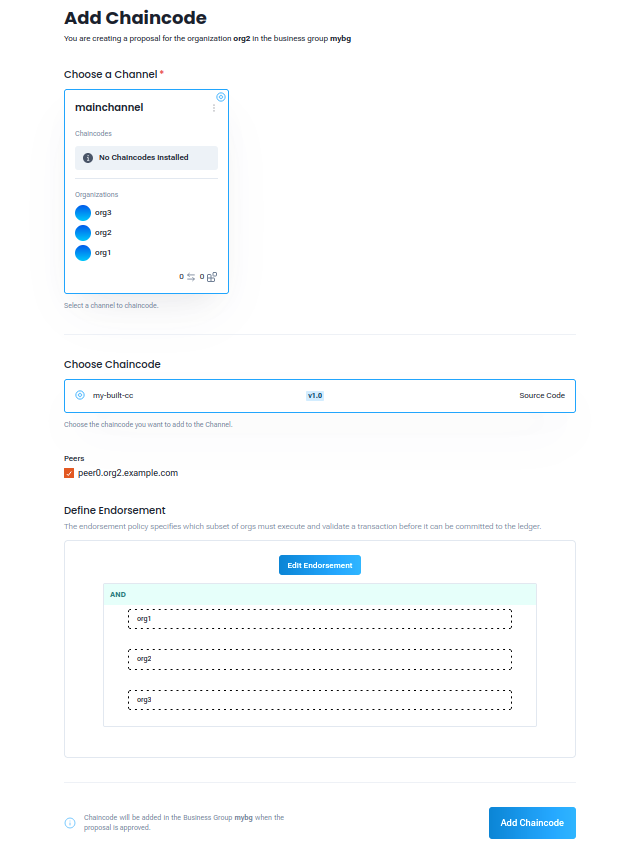 Figure 5: Example of deploying a chaincode
Accepting the proposal
Once you have created the proposal to deploy a chaincode, the proposal will be sent to the selected organizations for approval. The organizations can accept the proposal selecting the peers that will receive the chaincode, or reject the proposal. If all the necessary organizations accept the proposal, the chaincode will be deployed to the channel and will be available for use.
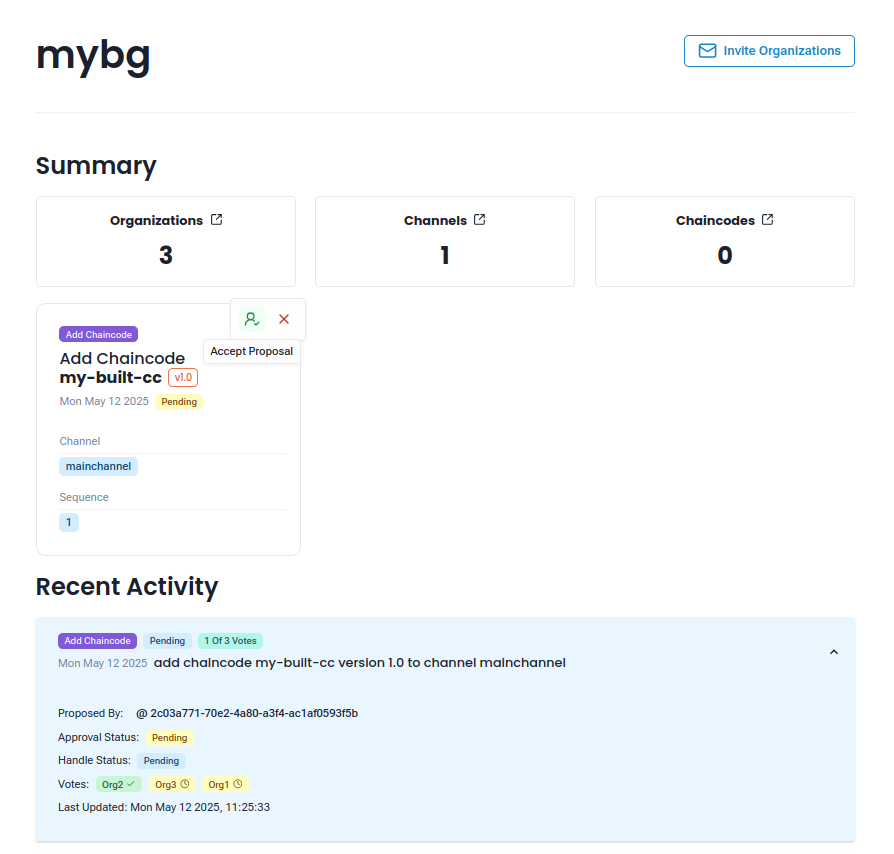 Figure 6: Example of proposal to deploy a chaincode
Next Steps
Now that you have deployed a chaincode to a channel, you can interact with it using the GoInitus Interface, a component of the organization that allows you to make transactions to the chaincode. You can also explore other features of GoFabric, such as managing your organizations and channels.
- Create a GoInitus: Learn how to Create a GoInitus to interact with the chaincode.
- Manage Organizations: Learn how to Manage your Organization.
- Manage Channels: Learn how to Manage your Channels.