Create Smart Contract
This document outlines the process for creating and managing smart contracts within your organization. The Smart Contract Creation feature empowers users to create and manage their smart contracts effectively.
Overview
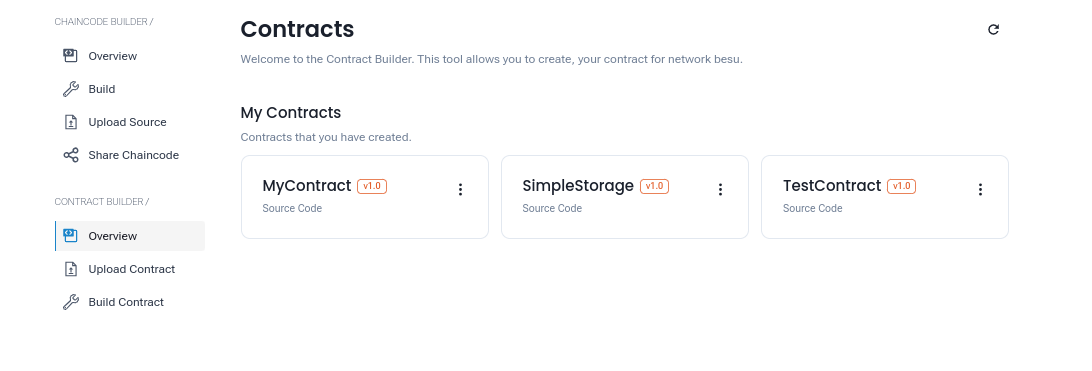
The Smart Contract Overview tab provides a comprehensive view of all the smart contracts associated with your organization. This interface includes details such as:
- Contract Name: The identifier of the smart contract.
- Version: The version of the deployed contract.
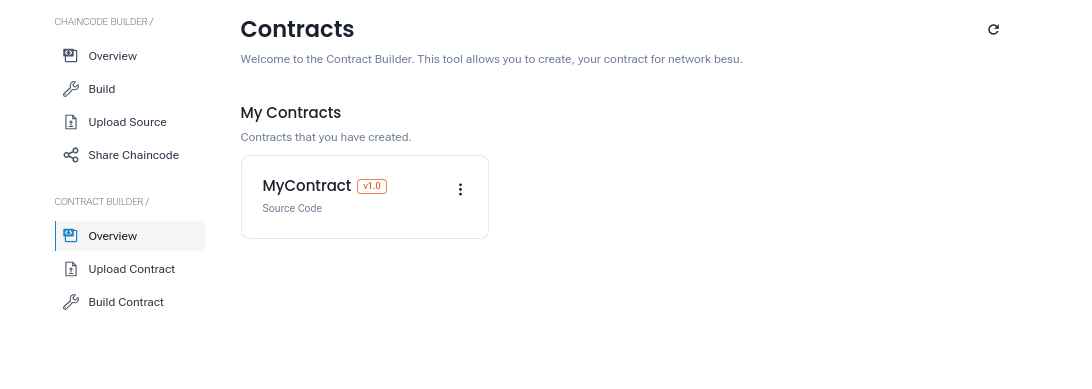
Users can perform various actions from this tab, such as creating, uploading, or interacting with their smart contracts.
Methods to Create a Smart Contract
There are two methods to create a smart contract:
- Upload Contract: For users who have pre-written smart contracts.
- Build Contract: For users who want to create smart contracts using the built-in builder tool.
Upload Contract
Steps to Upload a Smart Contract:
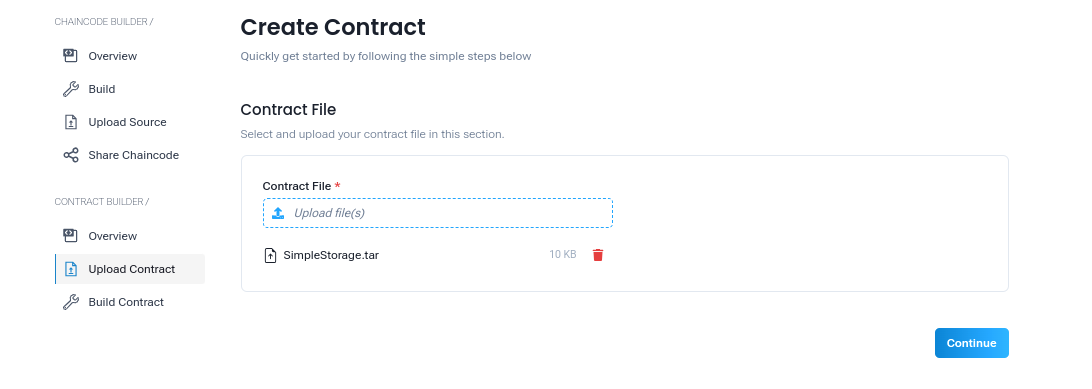
- Convert your smart contract file (in
.solformat) to a.tarfile. - This step packages the contract and its dependencies, making it compatible for upload.
- Navigate to the Upload Contract tab and click on Upload Contract.
- Upload the
.tarfile. - Once uploaded, you will be prompted to provide the following details:
Contract Details
- Contract Name to Compile*: The name of the contract to compile (as specified in the source file).
- Contract Name*: A unique identifier for the contract (e.g.,
MyContract). - Version*: The version of the contract (e.g.,
1.0).
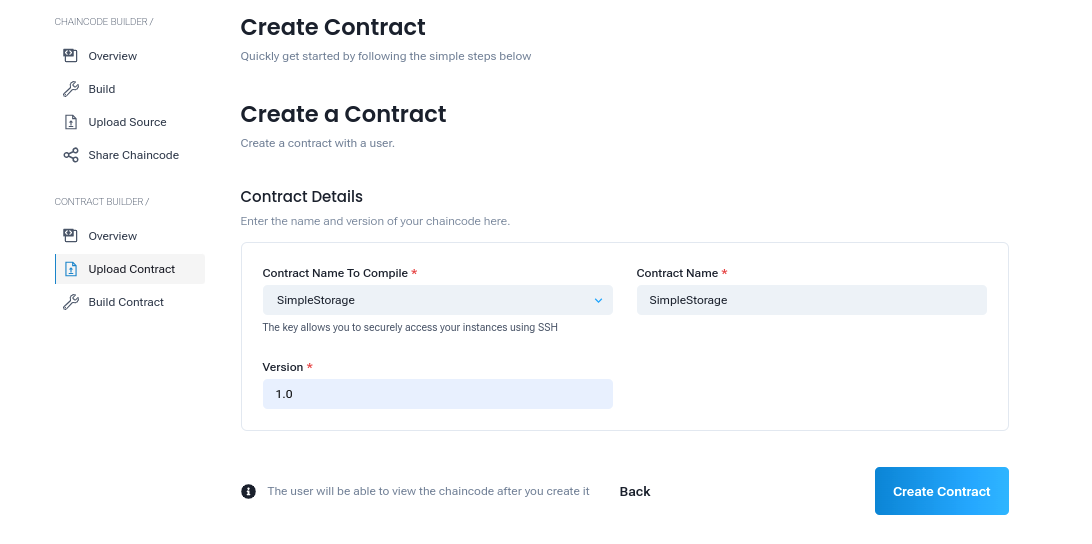
After filling out these details, click Create Contract.
Result:
- The smart contract will be created and listed in the Overview tab with its name and version.

Build Contract
The Build Contract feature enables users to create smart contracts using a user-friendly interface. This feature supports the creation of popular token standards such as ERC20, ERC1155, and ERC721.
Steps to Build a Smart Contract:
- Navigate to the Smart Contract tab and click on Build Contract.
- Provide the following details:
Contract Details
- Contract Name*: A unique identifier for the contract (e.g.,
TestContract). - Version*: The version of the contract (e.g.,
1.0).
Token Details
- Token Type: Choose the type of token you wish to create (e.g.,
ERC20,ERC1155, orERC721). - Token Name: The name of the token (e.g.,
test). - Token Symbol: The symbol for the token (e.g.,
TST).
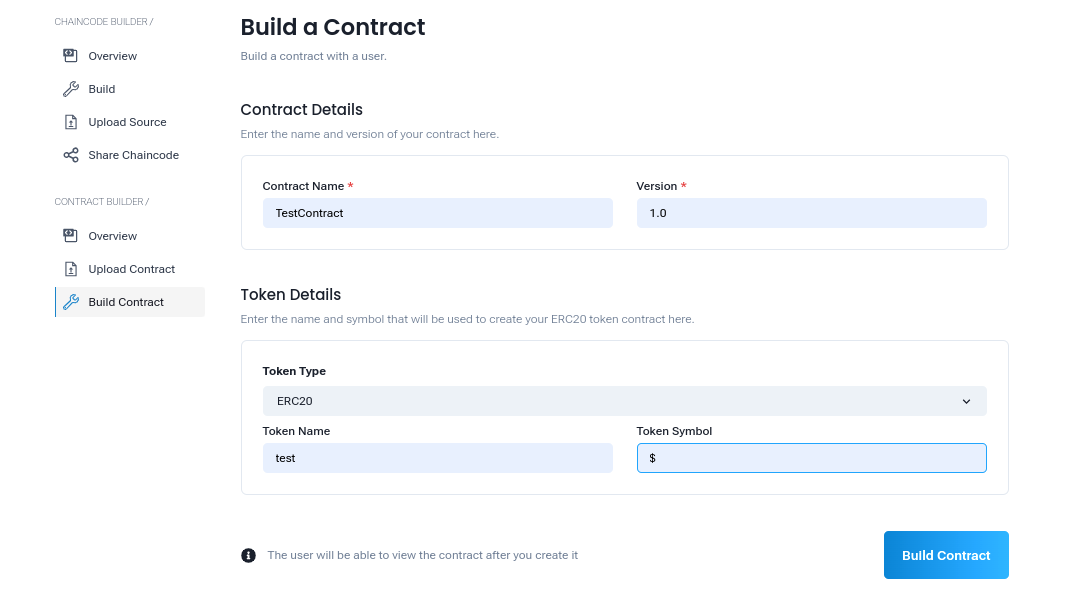
- Click Create Contract.
Result:
- The smart contract will be automatically compiled, created, and displayed in the Overview tab with its details.
Why Choose These Methods?
- Upload Contract: Ideal for developers with pre-written contracts who want precise control over their code.
- Build Contract: Perfect for users who want to quickly create standard token contracts without writing code manually.
Important Notes
- File Conversion: When using the upload feature, ensure the
.tarfile includes all dependencies required by the.solfile. - Version Management: Always assign unique version numbers to avoid conflicts during updates or redeployments.
- Token Standards: Select the correct token standard (ERC20, ERC1155, ERC721) based on your use case:
Advantages of Using This Feature
- Streamlined Deployment: Simplifies the process of deploying smart contracts, reducing the need for extensive technical knowledge.
- Tokenization Support: Built-in support for token standards makes creating tokens easy and intuitive.
- Flexibility: Offers both manual upload and guided creation for varied user preferences.
- Scalability: Easily manage and update contracts as your organization grows.
Recommended next steps:
- Deploy Smart Contracts: Learn how to Deploy Smart Contracts to your network.
- API: Learn how to create and manage Eth API.