Organization Overview
This document outlines the key features available for managing your organization within the network. These features include managing nodes, interacting with contracts via APIs, managing accounts, and modifying organization settings.
Nodes
Adding Nodes to the Network
As part of organization management, you can add nodes to your network. This section enables you to add new nodes, select a business group, and configure the network details.
-
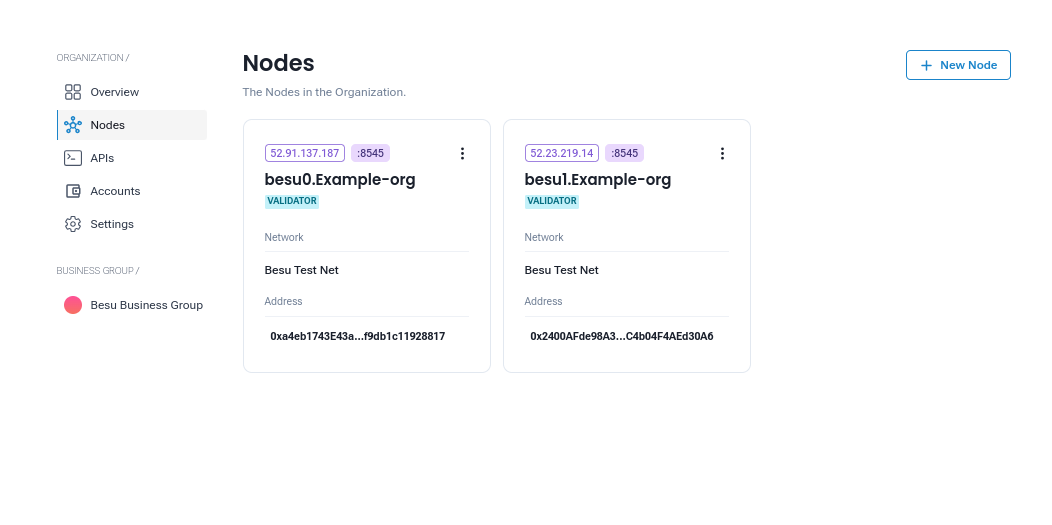
Navigate to Nodes Tab: In the Organization interface, you will see a Nodes tab where you can view the current nodes in your network.
-
Adding a Node: To add a node:
-
Click on the + New Node button to open a pop-up screen.
- Select a Business Group for the node.
- Fill out the required details, including Node Name, Network Host, and Network.
- Optionally, select if the node will be a Validator Node.
-
Click Submit to add the node to the network.
-
Previewing Nodes: You can view and manage all existing nodes in your network under the Nodes section. This will display details such as node names, status, and business group association.
For more details on How to Add Node
API
Interacting with Contracts in the Network
The API section provides a gateway for interacting with Ethereum-based smart contracts in your network. Through this API, you can manage and interact with contracts deployed within your organization’s network.
-
Gateway to Smart Contracts: The API acts as an interface to send and receive transactions between your organization and the blockchain network. It allows you to:
-
Read data from contracts.
- Execute transactions and trigger contract functions.
-
Manage contract states and interact with deployed applications.
-
API Access: Your organization will have a set of credentials for interacting with the API. This provides access to functions such as querying contract data, sending transactions, and managing contract interactions.
For more details on How to create API
Accounts
Managing Accounts within Your Organization
The Accounts section allows you to view and manage the accounts associated with your organization. You can create new accounts and view existing ones.
-
List of Accounts: You can view a list of accounts that belong to your organization. This section will display:
-
Account names.
- Associated business group.
-
Account status.
-
Creating a New Account: To add a new account to your organization:
- Click on the Create New Account button.
- Enter the necessary details such as the account name and business group association.
- Submit the request to create the new account.
For more details on How to Add Accounts
Settings
Organization Settings Management
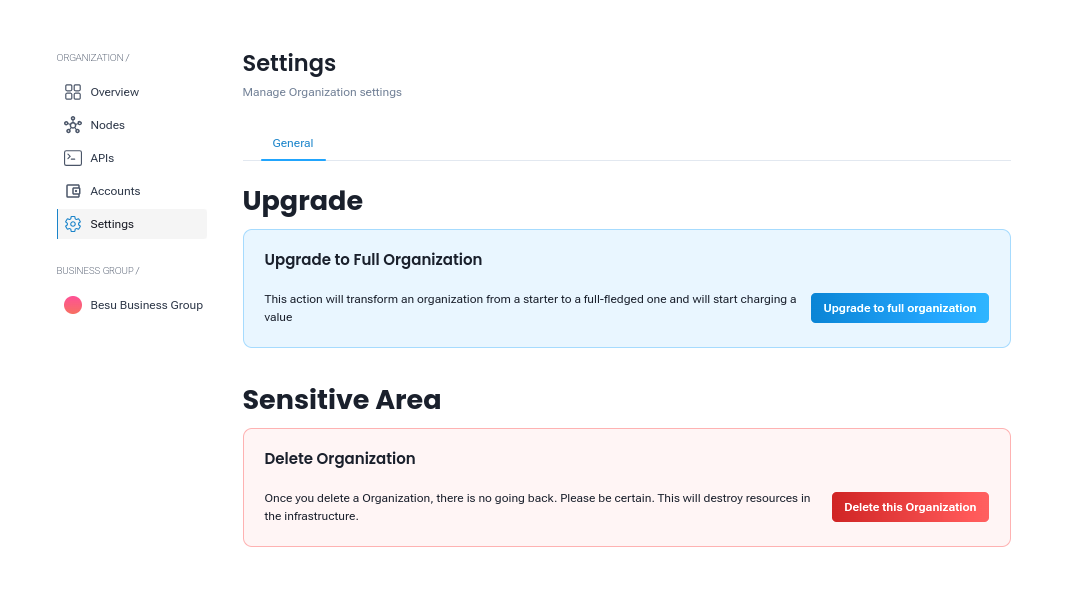
The Settings section allows you to configure your organization’s status and perform administrative actions like upgrading to a Full Organization or deleting the organization entirely.
-
Upgrade to Full Organization:If your organization is currently not a Full Organization, you can upgrade it by following a simple process in the Settings section.
-
Full Organization status grants additional permissions, such as the ability to add more than one nodes to the network.
-
Upgrade Process:
- Click on the Upgrade to Full Organization button.
-
Delete Organization:If you wish to delete your organization, you can do so from the Settings section.
-
Warning: Deleting an organization is a permanent action and cannot be undone. All associated data, nodes, and accounts will be removed.
- Click on the Delete Organization button and confirm the deletion.
Inviting Organizations
Process for Inviting an Organization
You can invite other organizations to join your business group in the network. Below is the step by step guide on how to invite a organization:
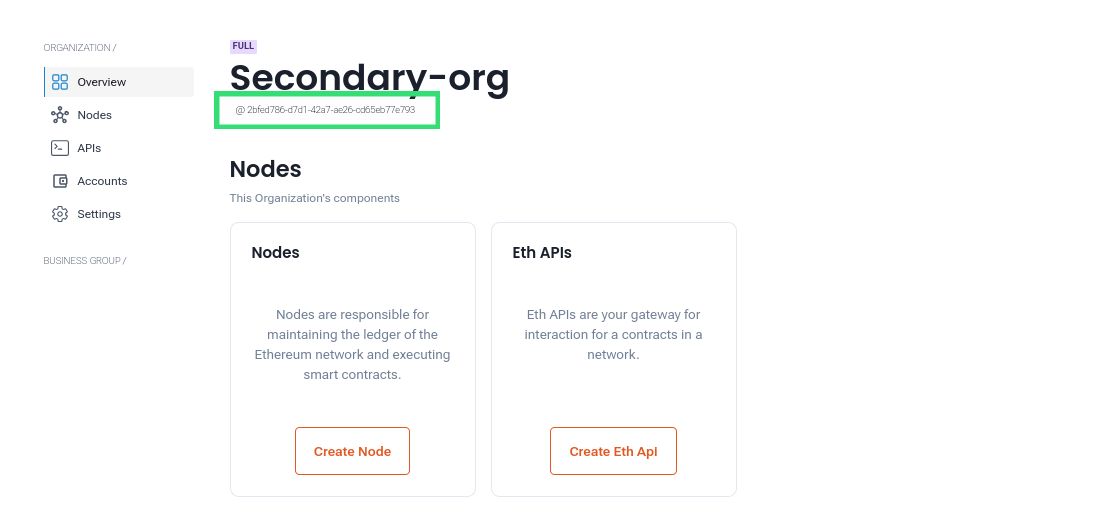
- Obtain the Organization ID: To invite a organization to your business group you need the Organization ID of the proposed organization. You can get teh organization id at overview screen of the organization.
-
Navigate to the Organization Overview Tab: In your dashboard, go to the Organization Overview tab.
-
Initiate the Invitation:
 :
:
-
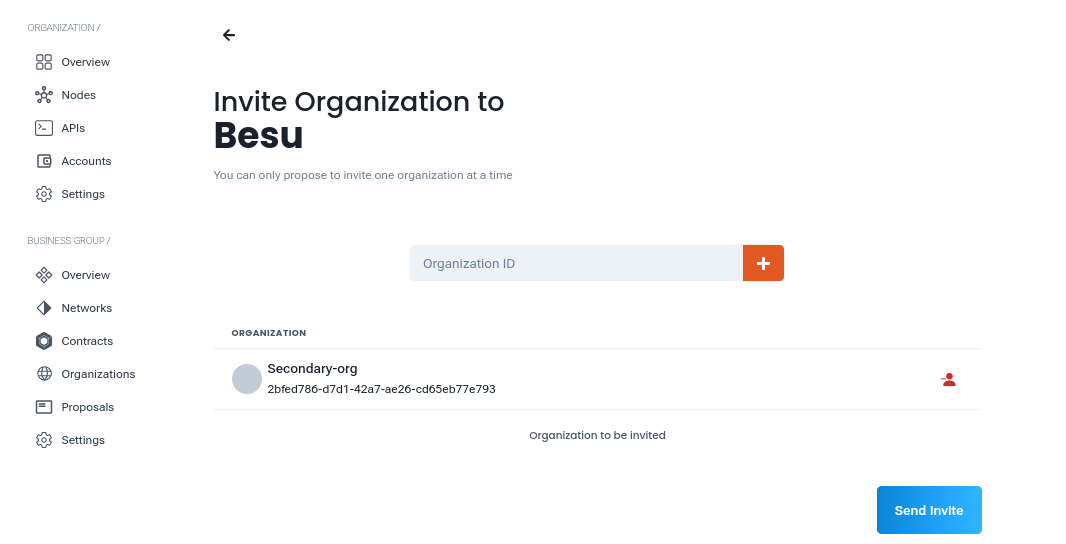
Click on the + Invite Organization button.
-
A prompt will appear asking for the Organization ID.
-
Enter the Organization ID and click the + button to add it to the invite list.
-
Submit the request to send the invitation.
-
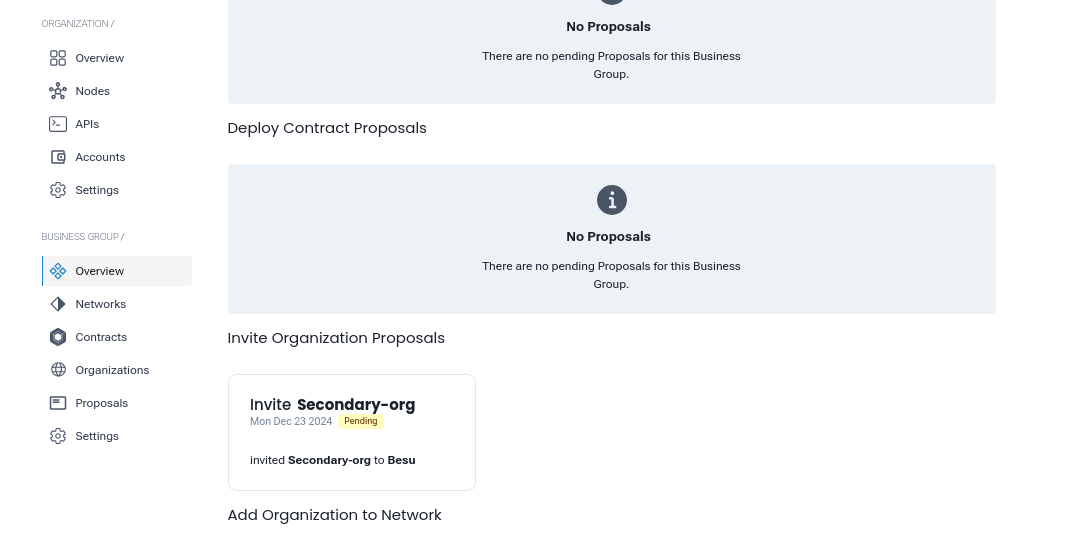
Proposal Sent: A proposal will be sent to the invited organization.
-
You can view the status of the proposal in the Overview Tab under the Invite Organization section. For example:
Accepting the Invitation
The invited organization can view the pending request in their Overview Tab. By accepting the request, the organization becomes part of the business group.
- The new organization can view nodes in the business group’s network.
- They gain access to details such as smart contracts deployed on the network and other business group resources.
Recommended next steps:
- Add Nodes To Network: Learn how to Add Nodes to your network.
- Create Smart Contracts: Learn how to Create Smart Contracts to your network.
- Deploy Smart Contracts: Learn how to Deploy Smart Contracts to your network.
- API: Learn how to create and manage Eth API.